Make Realistic Buildings With The Perspective Grid
The perspective grid is your key to creating realistic images.
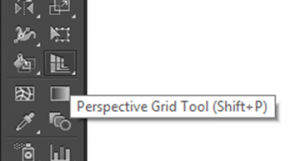
The Perspective Grid Tool
The tool can be located to the right of the live paint tool and just above the gradient tool.
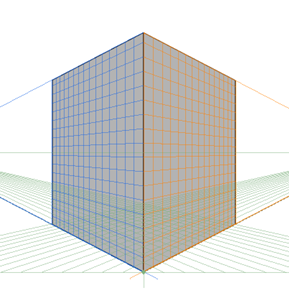
After clicking it will bring up the perspective grid.
There are 3 main parts to the grid, the first is the left hand side second is the right had side and last one is the ground.
You can switch between these 3 by using the widget which appears in the top left hand corner.
To help you they have been colour coded so you know which one you are working on!
The left hand side is a blue colour, the right hand side is an orange colour and the ground is a green colour.

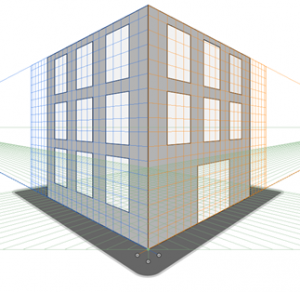
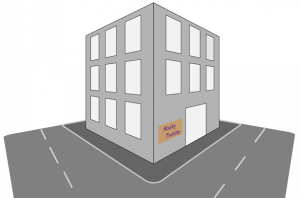
Creating The Building
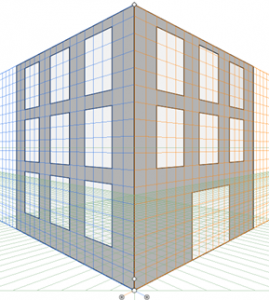
Now we have a grid we can start to create our building.
1. Select the rectangle tool and make sure right hand side is selected
2. Draw your rectangle, you will notice as you draw it keeps to the perspective!
3. Select the left hand side on the widget and do the same for that side.
Now you have the walls of your building you can add in some doors and some windows!
To do this all you do is select the rectangle tool and then draw onto the walls some windows and a door.
Remember to make sure that they are equal distance a part and all the same size otherwise it may look odd.
We also recommend you set them to a lighter colour so you can see them easily!
Perspective Tools can also be used for vector images to expand their depth.
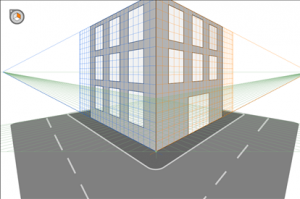
Adding More Details
Now we have a basic outline for the building we are going to add in a path and a road to make it more like a building.
1. Select a new layer and make sure it appears under the building layer.
2. Select the ground on the perspective grid
3. Select the rounded rectangle tool
4. Draw a rectangle under the building
5. Then give it a stroke to make it look like a curb.
Now you need to create another new layer and have it under the last one.
Then just repeat the same process!
Next add some road markings, to do that – just draw some lines down what would be the centre of the road.
We learn this and other great drawing tools on our illustrator classes!
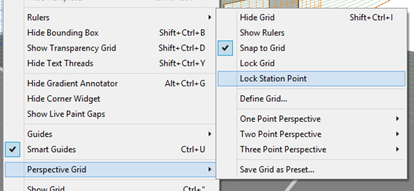
Changing The Perspective
Now that you have your building you might want to look at it from another angle.
To do this you need to go to the View tab and down to Perspective Grid and click Lock Station Point.
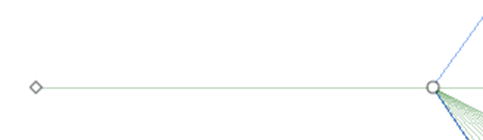
This will mean you can use the horizon points to change the angle you view the building at!
This is what the horizon points look like.
Now you have a building and you can change the angle of it and should have something which looks like this.
Looking for more illustrator tips? Read our guide here on The Gradient Mesh Tool!