
Incremental Refresh – Optimising Power BI
Contents
Optimising Power BI reports is crucial when it comes to speed and performance.
Incremental refresh allows you to keep historical data (previously loaded data) within your data source and only refresh the data that is changing.
Schedule refresh, on the other hand, takes all the data from your data sources and replaces everything within your Power BI data sets.
In pretty small data sources, schedule refresh is great, but when you have large data sources with lots of data, you don’t want to be pulling all data sets every time you refresh your reports.
Let’s get into the details of incremental refresh: how to set it up, challenges and considerations and advanced tips.
If you think that learning about this option and others with the help of an expert trainer would be better for you, take a look at the Power BI courses we have available.
Understanding Incremental Refresh
Incremental refresh in Power BI is a process that allows you to refresh data progressively (load new or updated data) rather than performing a complete refresh every time. This will significantly speed up your data refresh process and reduce the amount of data transferred between Power BI and your data source.

Setting Up Incremental Refresh
In this article, you’ll learn step-by-step how to configure incremental refresh within your Power BI reports like a pro, allowing you to get real-time and up-to-date data at your fingertip.
You can implement incremental refresh in Power BI by following these steps:
- Create Parameters.
- Filter Data.
- Define Policy.
- Save and Publish to Power BI Service.
- Refresh Model.
Create Parameters
In the Power Query Editor, you’ll create RangeStart and RangeEnd parameters with default values or the most recent data values from your data source.
In the Power BI Desktop interface, select Transform data from the Home ribbon to open Power Query Editor.

Click on Manage Parameters > New Parameter.

You’ll create your RangeStart (case-sensitive) and RangeEnd (case-sensitive) parameters here.
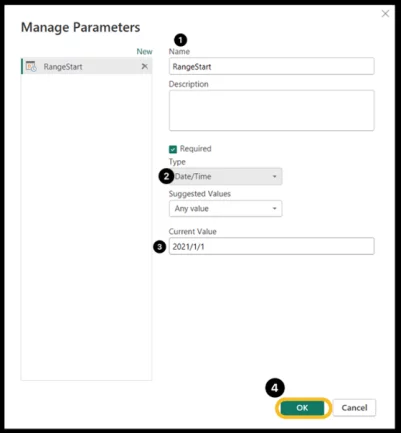
Enter RangeStart (case-sensitive) in the Name field and select the Date/Time option from the drop-down of the Type field.
Input a start date or both start date and time value in the Current Value field. Select OK.
Select New to create a second parameter named RangeEnd (case-sensitive).
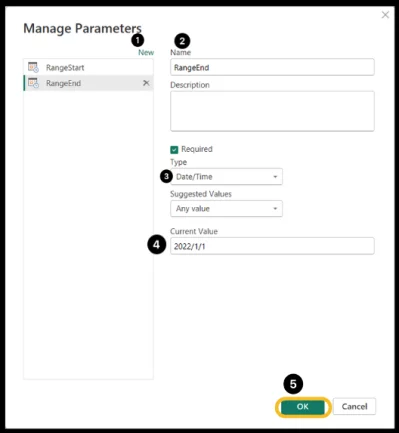
In the Name field select the Date/Time option from the drop-down of the Type field. Input an end date or both end date and time value in the Current Value field. Select OK.
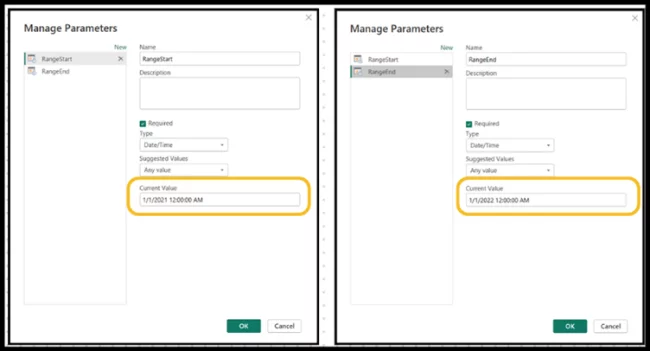
By default, Power BI attaches a timestamp of 12:00:00AM, after inputting both the start date and end date.
Also, default values of any date and time range can be used while creating the RangeStart and RangeEnd parameters. After publishing to Power BI services, the incremental refresh policy will override the time range values.
Even if you like to work with Power BI, it’s always good to know about other similar tools. Read our article about Power BI vs Tableau.
Filter Data
Next, you’ll apply filters on your data source table using the RangeStart and RangeEnd parameters. Make sure your source table has a Date column of Date/Time data type.
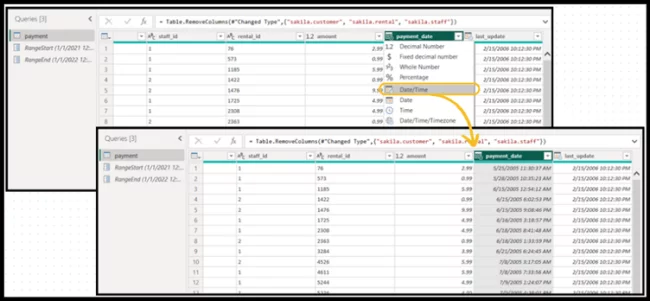
Select the column containing the date in the Power Query Editor to filter on.
Click on the drop-down arrow on the column > Date/Time Filters > Custom Filters.
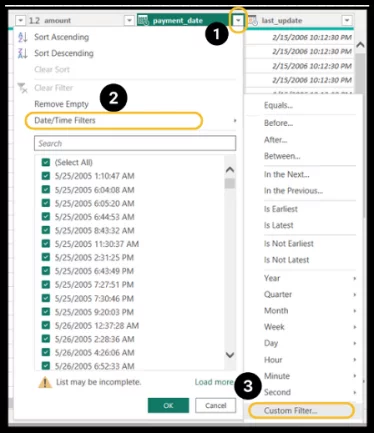
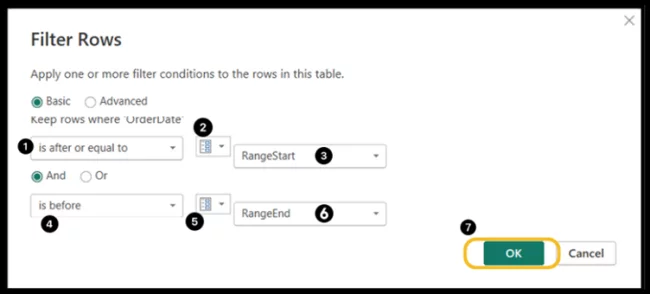
The Filter Rows dialogue box pops up to specify the filter conditions.
Select is after or is after or equal to, then click on Parameter in the drop-down options. After this, choose the RangeStart parameter and is before. Now click on Parameter in the drop-down options and then choose RangeEnd. Select OK to close.
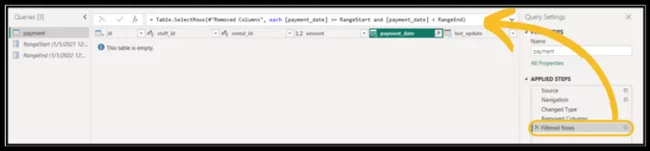
The whole table gets filtered to accommodate new rows based on subsequent refreshes. Power Query loads data based on the filters defined by the RangeStart and RangeEnd parameters.
The table should load quickly depending on the amount of data within the period of the RangeStart and RangeEnd parameters. If it’s slow and process-intensive, then it’s likely the query is not folding.
Define The Policy
After filtering the data source based on RangeStart and RangeEnd parameters, you’ll define an incremental refresh policy. This policy is applied only after the model is published to the Power BI service and a manual or scheduled refresh operation is performed.
In the Data view, right-click a table from the Data pane > Incremental Refresh.
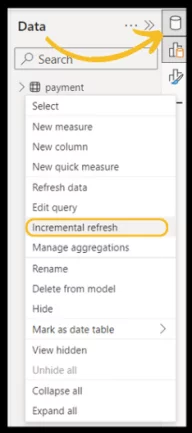
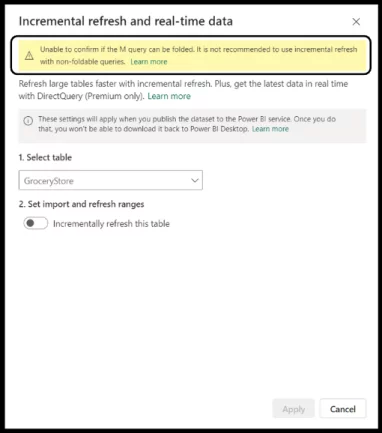
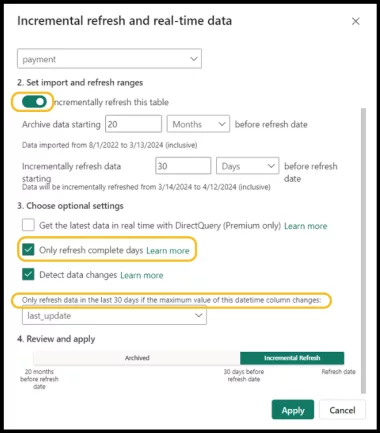
Select the table from the Incremental Refresh and real-time data dialogue box pop-up to provide the required settings.
Toggle the slider on the Set import and refresh ranges to enable the incremental refresh settings.
Specify the historical store period to include in the model under Archive data starting and specify the refresh period under Incrementally refresh data.
All rows with dates in the archive date starting period will be loaded into the model when published to the service.
Choose Detect data changes in the Choose optional settings to specify a date/time column used to identify and refresh only the days where the data has changed. The column must be different from the column used to partition the RangeStart and RangeEnd parameters.
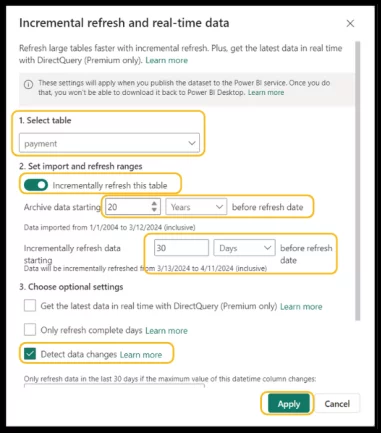
Review your settings and then select Apply to complete the refresh policy.
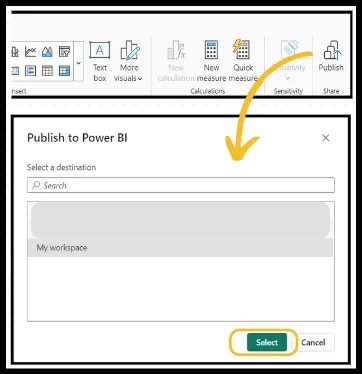
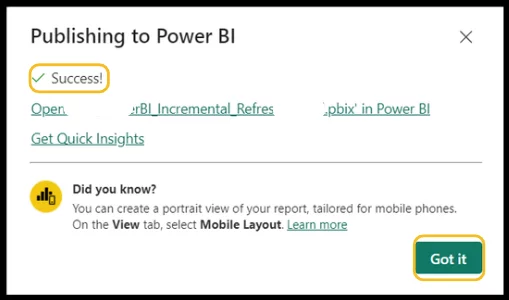
Save And Publish To Power BI Service
Now that you have your RangeStart and RangeEnd, filtering and refresh policy settings are all complete. Save your model and then publish to the service.
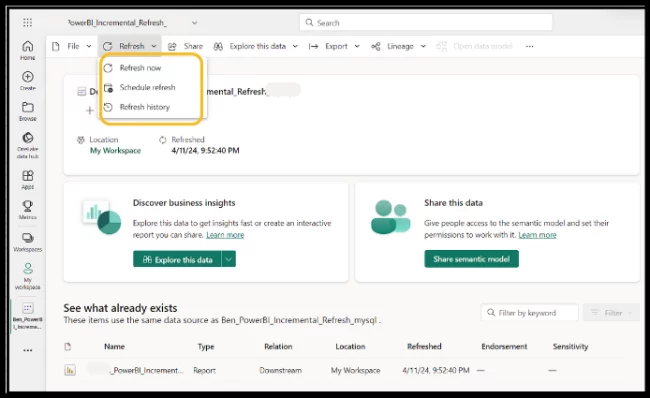
Refresh Model
In the service, you’ll refresh your model. You can either perform a manual refresh or a scheduled refresh. The refresh can take a while, depending on the amount of data.
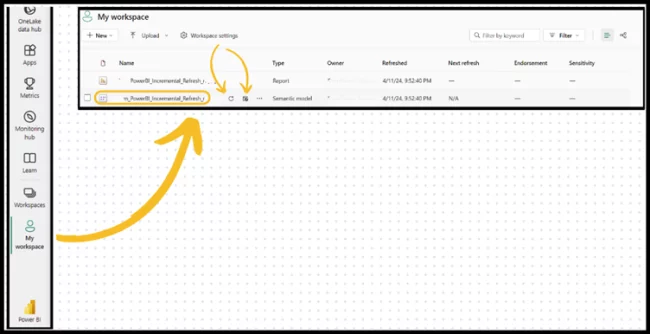
The first refresh should load both new and updated data in the refresh period and historical data for the entire store period.
Subsequent manual or scheduled refresh operations will be much faster because the incremental refresh policy is applied, and only the data within the period specified in the refresh policy settings is refreshed.
Benefits Of Incremental Refresh
Incremental refresh not only allows you to refresh a part of your data set from your data source but also comes with some benefits like:
-
- Quick Refresh Cycle: With incremental refresh, your refresh will be quicker and faster compared to reloading whole data sets from your data source for updated and current data.
- Reliable Refresh: Power BI refresh doesn’t have to work for long periods with an incremental refresh. Queries to source data run faster, reducing the potential for network problems to interfere.
- Less Memory: Incremental refresh consumes less memory and reduces the amount of data transferred between Power BI and your data source.
- Easy Setup: Easy to set up on Power BI desktop with a few clicks. When published, Power BI service automatically applies those policies with each refresh.
Since we are talking about efficiency, Power BI templates are another useful tool to be able to work faster. Check out our article on this topic.
Challenges And Considerations
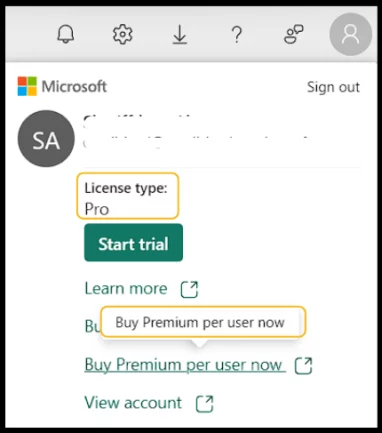
Power BI Licenses
Before considering implementing incremental refresh in your Power BI report, you’ll need at least a Pro License, Premium Per User License, Power BI Premium, or Power BI Embedded Models supported plans, and your data source must support query folding.
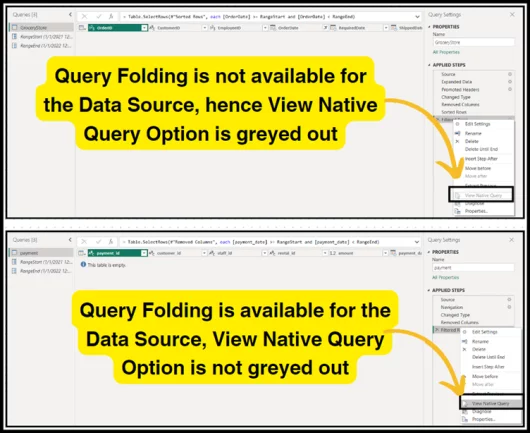
Query Folding
The most prevalent issue faced while configuring incremental refresh in Power BI is query folding. It’s important to note that your data source must support query folding for you to be able to set up incremental refresh.
Structured and relational databases like SQL, Azure Synapse, Direct Query, or Import and Data Warehouse work best as data sources for incremental refresh. Your data sources must be folded in Power BI Desktop before publishing to the service.
Power BI desktop throws a warning “Unable to confirm if the M query can be folded. It is not recommended to use incremental refresh with non-foldable queries.” in the incremental refresh dialogue box, indicating the query to be executed against the data source does not support query folding.
Verify query folding in the Power BI desktop under the applied steps within the Power Query Editor. Some transformations in the applied steps might disable and not support query folding. All applied steps must be folded.
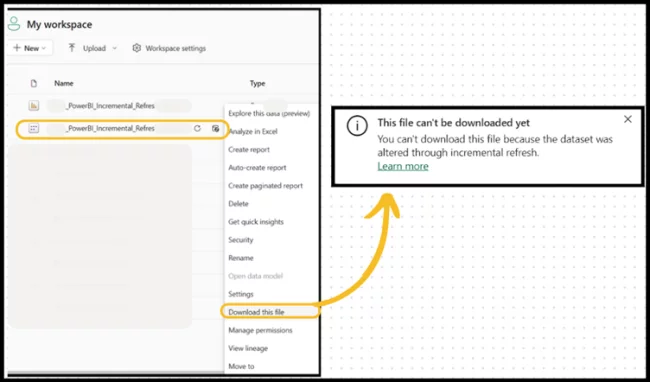
Download Power BI Files In The Service
Once you’ve published your model to the service, you won’t be able to download the file again for any alteration due to the incremental policy in place.
If you need to make a change in the future, make sure to have a copy backed up for alteration, make your changes, and re-upload the model to the service again.
This will mostly happen with a Power BI Pro license but with a Premium Per User or Premium Per Capacity Workspace license, you can make changes to the data set using some advanced technique with the tabular editor.
Advanced Tips For Incremental Refresh
Here are some advanced tips for optimising and making your incremental refresh setup seamless for optimal performance.
- Refresh Complete Days: When configuring incremental refresh policies, it is important to check that the box only refreshes complete days to avoid unnecessary data processing, and only load updated and required data within your incrementally refreshed data range.
If the slider is disabled, it means the Power Query expression for the table doesn’t include a filter based on the RangeStart and RangeEnd parameters.
- Data Flow: You can set up your incremental refresh to a data flow to avoid the limitations of not being able to download the file or make changes to your data sets cause data flows act as a data source where your data sets can pull data from.
Are you tired of your Power BI running slow? We have gathered some tips on how to speed up Power BI in this article.
Conclusion
You can benefit immensely from the incremental refresh feature to enhance and make your Power BI reports efficient and timely by only refreshing new or updated data within your data sets.
As a Power BI professional, you need to be updated and master the latest features of Power BI to stay ahead in the data world.


- Facebook: https://www.facebook.com/profile.php?id=100066814899655
- X (Twitter): https://twitter.com/AcuityTraining
- LinkedIn: https://www.linkedin.com/company/acuity-training/