[Power BI Security] 7 Quick Tips To Get Started!
Contents
One of the most valuable features of Power BI is its security features.
They’re comprehensive and easy to work with – a rare combination!
This beginners’ article looks at Power BI’s top 7 security features.
Power BI has plenty more security features, but you should start with these if you are learning to use Power BI.
1. Workspace Security
Workspace security is the first level of Power BI security.
Workspace security governs access to published artefacts like datasets and reports.
When you create a workspace in Power BI service, each workspace is divided into four roles.
- Admin.
- Member.
- Contributor.
- Viewer.
Only give users the access level that they will need, and no more.
For people in large organisations, your business might benefit from using Microsoft Fabric for it’s enhanced security features.
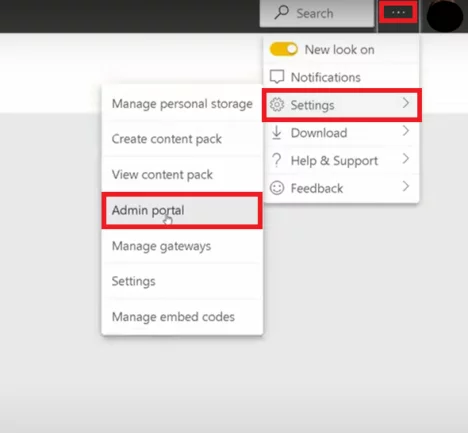
To access workspace security in Power BI, locate the Settings tab and select Admin Portal to create a workspace. You must be an administrator to do this.
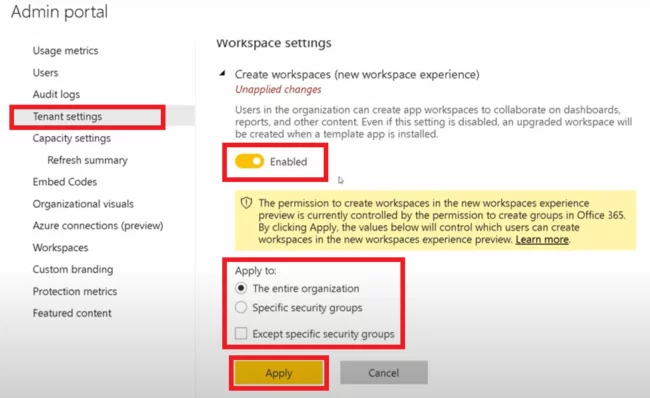
You can assign the ability to create new Workspaces to different users in your organisation in the Tenant settings, then click Apply.
Advantages of using Power BI Workspaces
The benefits of using workspaces when you are sharing data with many people using Power BI are:
- Simpler Team Collaboration
- Multiple Workspaces
- Isolated User/Group Management
- Improved Developer Environment

2. Administrators
With a Power BI Pro license (see power bi licensing for more details), the administrator has complete control of a workspace.
An administrator can update or delete the workspace, add or remove other administrators, and disallow external data sharing.
Only grant admin privileges to people you trust well.
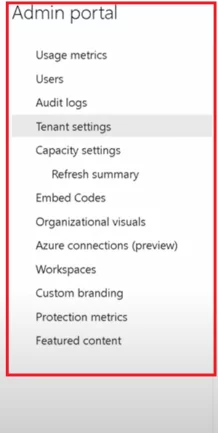
You manage the Power BI settings for all users in your organisation through the admin portal.
3. Sharing and Export Settings
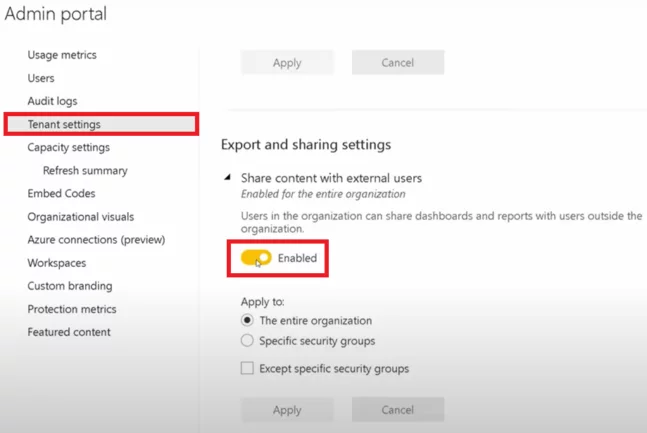
Power BI allows users to share content with people outside your company as standard.
It isn’t a good idea to have this as a default setting.
In the Tenant settings, you should Disable it.
Similarly, it also allows you to export to Excel and PowerPoint.
There’s little point in securing data in Power BI if people can just download it and then share it.
Again, go into the admin portal and disable this setting.
4. Row-Level Security
Row-Level Security (RLS) is a feature of Power BI that allows you to publish reports to users within your organisation, but show different people different rows of data.
You can define filters within roles to limit data access at the row level.
Roles and rules are defined in Power BI Desktop.
When you publish data or a report to Power BI Service, you also publish role definitions. This allows you to assign specific roles to specific users.
Row-level security is a powerful tool for controlling access to sensitive datasets, dashboards, and reports and means you don’t need to create different reports for different users. To learn more, see: Row-level security in Power BI and dynamic row-level security in Power BI.
5. Power BI Data Protection
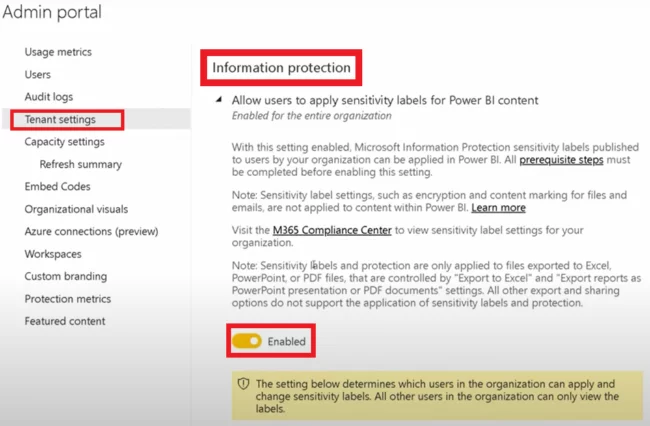
Power BI’s Microsoft Information Protection, also known as data protection, allows you to apply sensitivity labels to your data.
It helps you protect your organisation’s data regardless of how or where it is accessed.
For example, imagine a member of your organisation downloads an Excel spreadsheet containing sensitive data from Power BI.
Information Protection would automatically apply a sensitivity label and protect the data by encrypting it and content-marking the downloaded file.
It helps to keep the data and content secure outside Power BI.
6. Office 365 Admin Centre
The Microsoft Office 365 Admin Center is where you administer your organisation’s Microsoft 365 subscription.
It allows you to add and remove users, change licenses, and reset passwords, among other things.
Admin permissions are automatically granted to anyone who signs up for and purchases a Microsoft 365 for business subscription.
This person can give other people administrator permissions to help them manage Microsoft 365.
To see who has which privileges, you can review them in the admin centre.
Log in to your Office 365 account to access the Admin Centre.
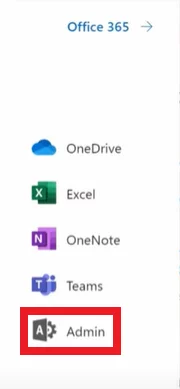
In the app launcher, select Admin.
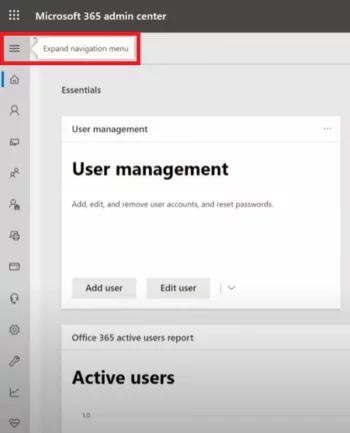
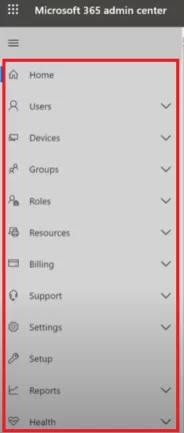
Expand the Navigation menu to perform more administrative tasks.
As you can see, there are lots of different options in the admin centre.
You can add and remove users, assign product licences, and do a lot more as an administrator.
7. Azure Active Directory
Azure Active Directory (“AAD”) controls access to Power BI service.
If you use AAD, you can implement a number of useful policies like:
- Limiting access to and from trusted locations
- Restricting access to machines with specific operating systems and / or joined to the domain
- Enforcing multifactor authentication
Final Thoughts
In Power BI, each level of security protects a specific area.
The most critical is workspace security, which regulates access to objects like datasets and reports.
As your Power BI skills improve, make sure that your security skills also grow to keep your data safe!
For more on Power BI, check out our this article to get 15 Power BI experts top tips!
- Facebook: https://www.facebook.com/profile.php?id=100066814899655
- X (Twitter): https://twitter.com/AcuityTraining
- LinkedIn: https://www.linkedin.com/company/acuity-training/
