
Master VBA Special Cells In Excel! [Advanced Guide]
Contents
In this post, we are going to review the VBA Special Cells method in Excel.
You can use the VBA Special Cells Method to select cells of a specific type or that match a certain criterion.
It is also great in combination with other methods, which you can learn about on our VBA Excel courses in London!
Brief VBA Introduction
Visual Basic for Applications (VBA) is an object orientated language that is integrated into Office Applications such as Word, Excel, PowerPoint, and Access.
You can use VBA to automate your documents, desktop databases, presentations, and spreadsheets.
It can be tricky to get into, so we always break down why VBA is useful for data processing on our courses before digging into the technical side!
When getting started with any programming language, it’s advisable to go over the basics first. We have some article suggestions that will assist you in this regard.
- Our Introduction to Macros article will get you up to speed with how to add the Developer Tab to the Ribbon. You will learn all about how to create simple macros in Excel. In addition, you will learn how to assign shortcut keys to macros and how to assign macros to buttons.
- Our Introduction to VBA article covers the VBA object model in Excel, and goes over what objects, properties and methods are. You will also learn about how to access the Visual Basic Editor. You will discover how to change the properties of objects.
In this article we will cover a method called the Special Cells Method. We will also briefly go over some other common methods.
Let’s see where we are in our Learning VBA Basics Roadmap.


Using The Go to Special…Command
You can utilise the Go to Special Command in Microsoft Excel to select all cells that meet a specific criterion, without using VBA.
So let’s see how to do this first.
We have a sample worksheet containing the monthly sales data for each region. In range C18:F18 we are using the SMALL Function to calculate the second lowest sales value for each region.
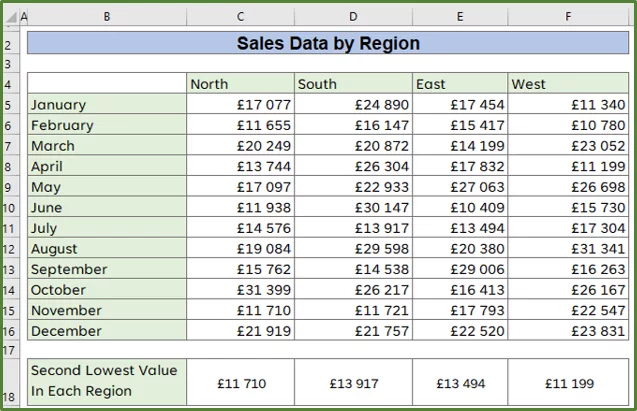
So, the first thing we would like to do, is select all the cells containing a formula that returns a number.
Step 1:
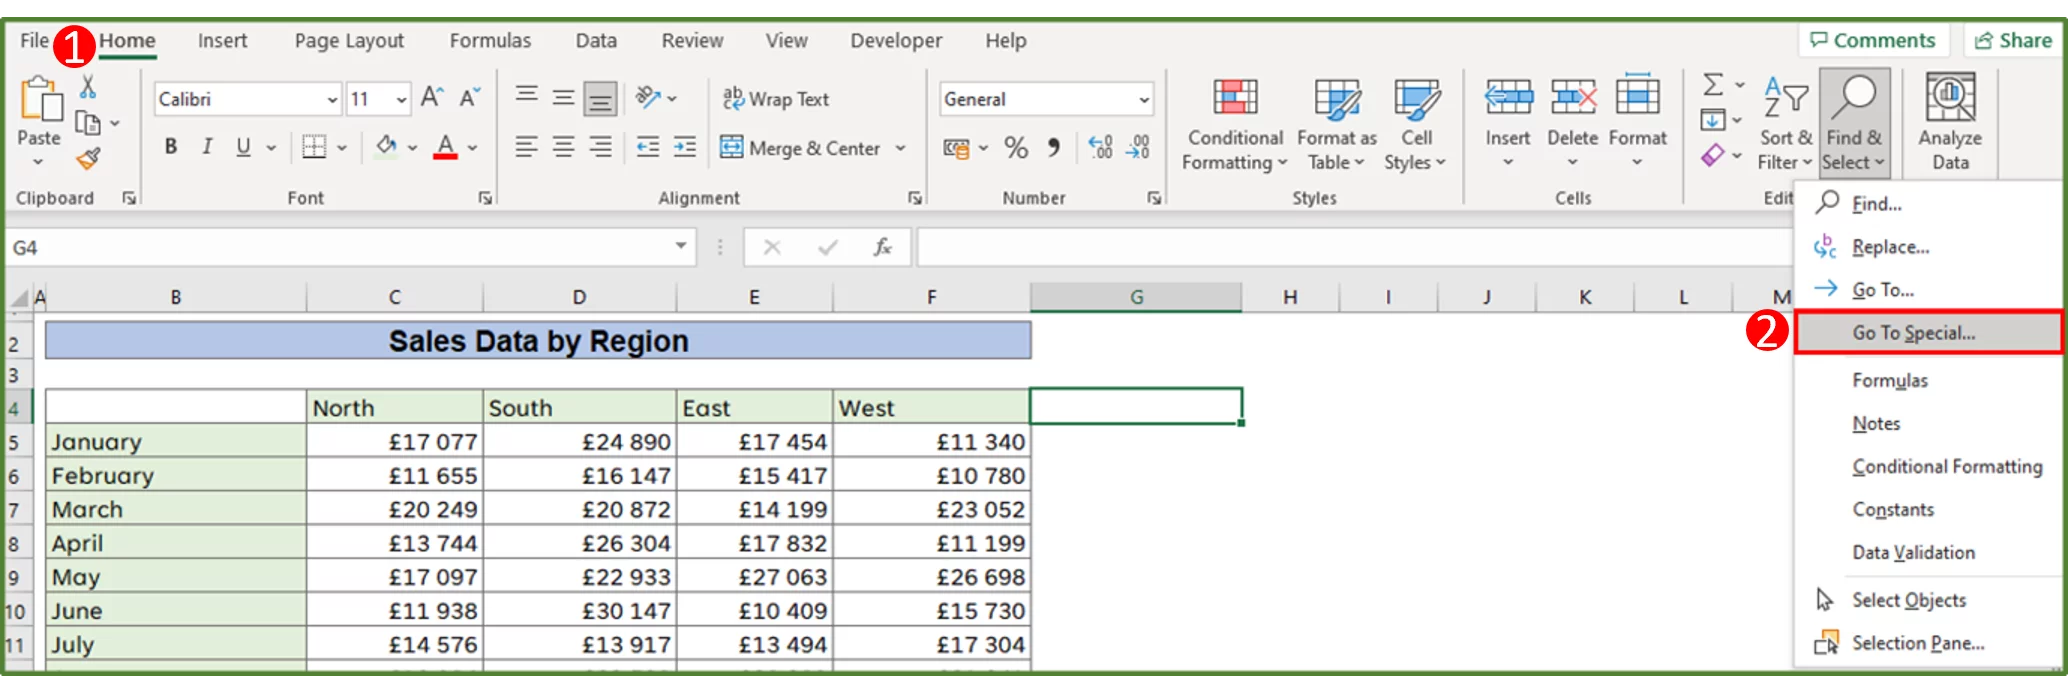
With any cell in the worksheet selected, go to the Home Tab (Step 1 in the image) and in the Editing Group, click the Find & Select option. Choose Go To Special…(Step 2 in the image).
Step 2:
Using the Go To Special…Dialog Box select Formulas and ensure that only the Numbers option is checked. Click Ok.
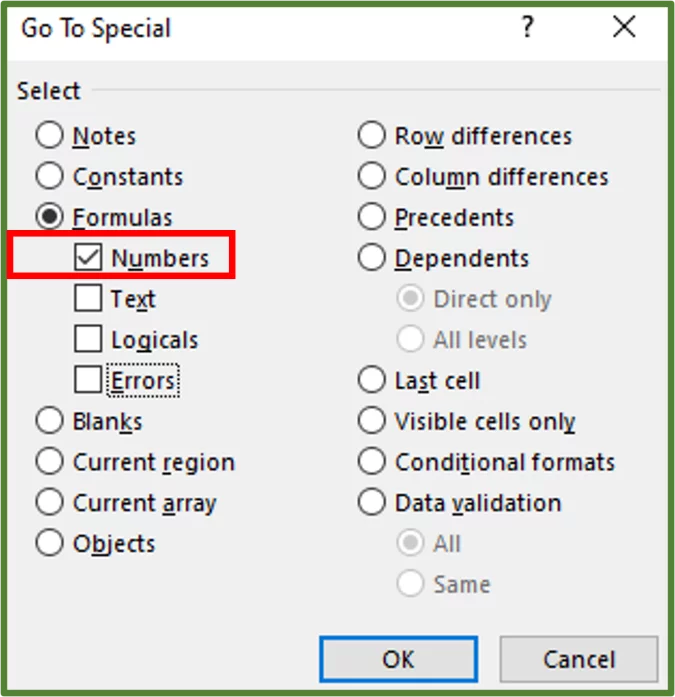
Now only the cells, containing formulas that return numbers will be selected.

How To Use Special Cells – Simple Example
So, we can use the Special Cells method in VBA, to do the same thing.
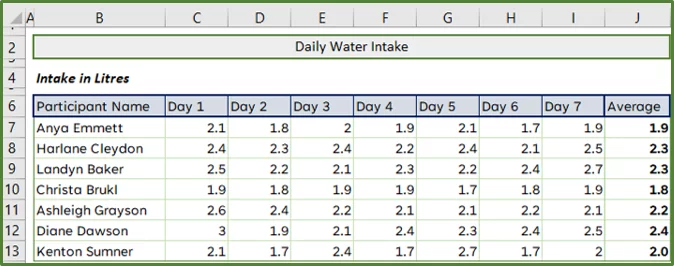
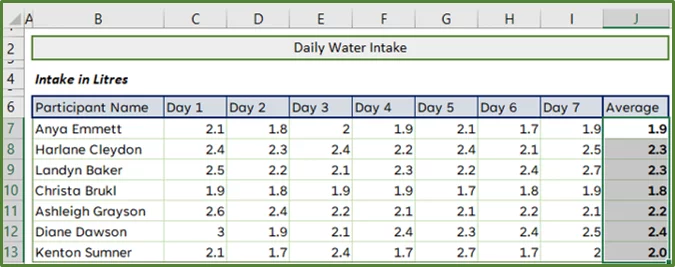
We have the sample data set shown below. A hypothetical research institute conducted a study.
They asked seven participants to monitor their daily water intake.
In range J7:J13 the AVERAGE Function is used to calculate the average for each row.
Step 1:
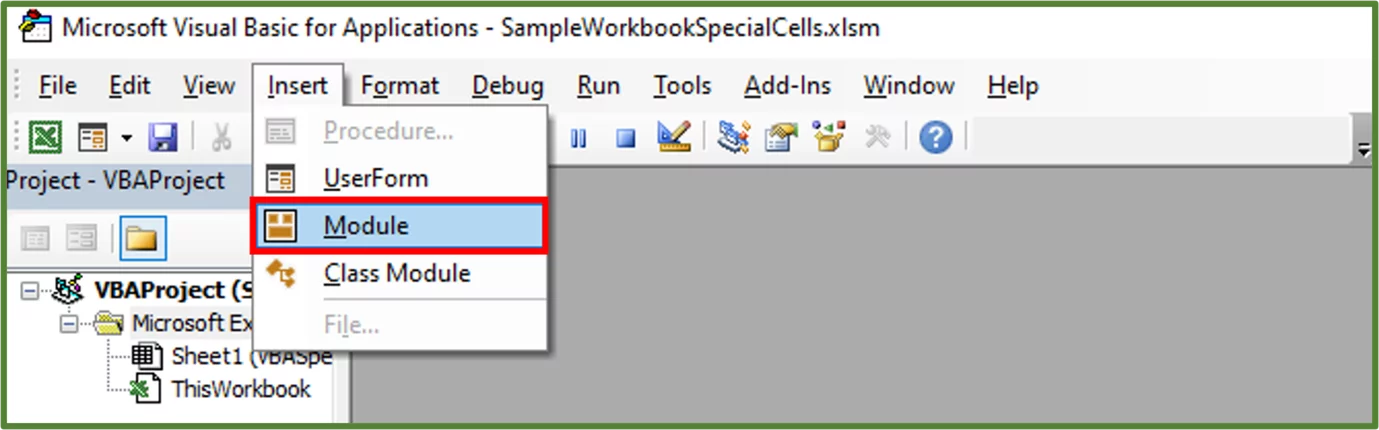
So, the first thing we need to do, is access the Visual Basic Editor. To do this you can simply press Alt-F11 on your keyboard.
Go to the Insert Tab and choose Module.
Step 2:
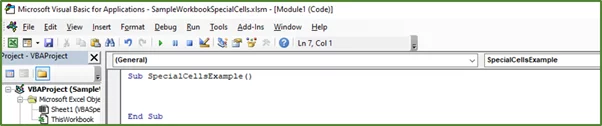
Enter the following code to create a sub procedure.
Sub SpecialCellsExample()
End Sub
Step 3:
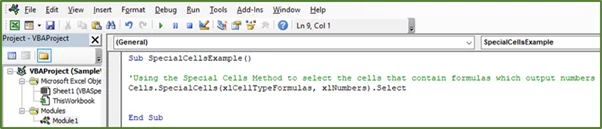
Type the following code within the sub procedure.
Sub SpecialCellsExample()
‘Using the Special Cells Method to select the cells that contain formulas which output numbers
Cells.SpecialCells(xlCellTypeFormulas, xlNumbers).Select
End Sub
Now let’s look at the code in greater detail.

The Cells part of the statement refers to the Cells collection. This collection contains all the cell objects.
You can also make your own VBA class module to create objects with specific properties!
The next part of the statement is the SpecialCells method. The syntax of the SpecialCells method is:
expression.SpecialCells(Type, Value)
-
- Where expression denotes an object.
- The parameters of the method are Type which is required and Value which is optional. In this case we are saying that the type should be formulas and the value specifies that it should be formulas which output numbers.
If we had omitted Value, then cells that contain formulas that output numbers, text, logical formulas, and errors would be selected.
If we take a look at our previous Go To Special…Command example, when one specifies formulas then all the cells with formulas are selected. However, if you check a certain option let’s say numbers then only the formulas that output numbers will be selected.
The next part of the statement is the Select method.
Step 4:
Now to run the code, place the cursor in your sub procedure code. Go to the Run Tab and select Run Sub/Userform.
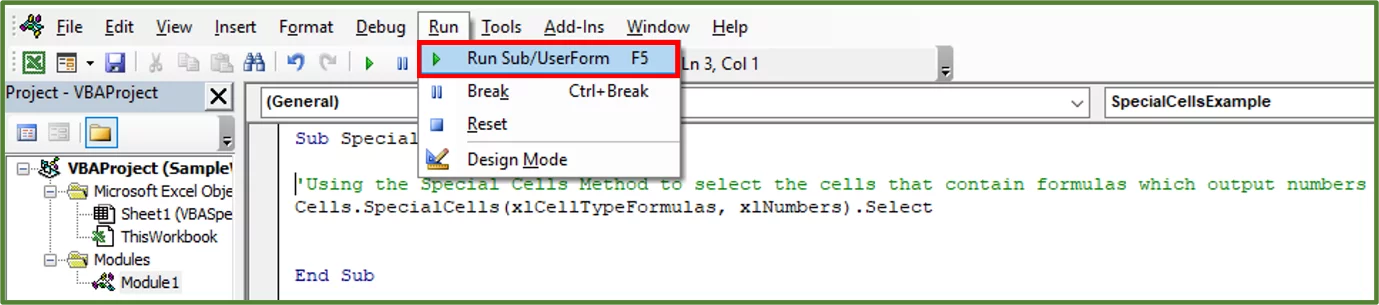
You should see the following.
How To Use Special Cells – More Examples
Using the Special Cells Method to select and format Blank Cells
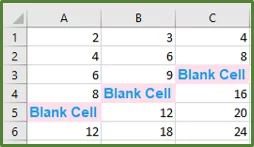
Now let’s look at another example where we can use the Special Cells Method. In the following data set we have some blank cells.
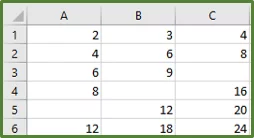
So, what we want to do is select only the blank cells using the Special Cells method. We will then change the text in these cells to Blank Cell and change the font, weight, color and fill of these cells.
Step 1:
So, press Alt-F11 to go to the Visual Basic Editor. Go to the Insert Tab and choose Module.
Step 2:
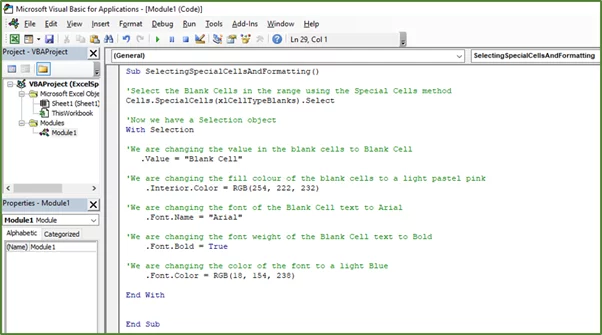
Enter the following code.
Sub SelectingSpecialCellsAndFormatting()
‘Select the Blank Cells in the range using the Special Cells method
Cells.SpecialCells(xlCellTypeBlanks).Select
‘Now we have a Selection object
With Selection
‘We are changing the value in the blank cells to Blank Cell
.Value = “Blank Cell”
‘We are changing the fill colour of the blank cells to a light pastel pink
.Interior.Color = RGB(254, 222, 232)
‘We are changing the font of the Blank Cell text to Arial
.Font.Name = “Arial”
‘We are changing the font weight of the Blank Cell text to Bold
.Font.Bold = True
‘We are changing the color of the font to a light Blue
.Font.Color = RGB(18, 154, 238)
End With
End Sub
Now let’s look at the code in greater detail.
Once we select a cell, a range of cells or any other object. We have what’s called a Selection Object, so in other words, our selection itself is regarded as an object.
We use the With …End With Statement so that we simplify our code and change the selection object’s properties in one go. This means that we do not have to repeat that it is the selection object we are working on, each time we change a property.
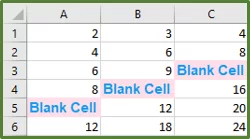
Now with your cursor placed in the sub procedure code, press the F5 key on your keyboard to run the code.
Using the Special Cells Method to select only the visible cells
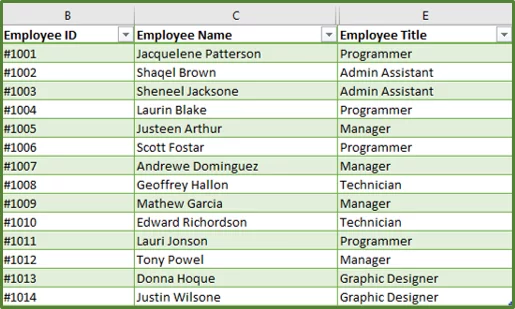
In the following data set, column D which contains the email addresses of the employees, is hidden. This data set is on a sheet called SourceDataTable. We want to select only the visible cells and then copy and paste this on another sheet called PastedData.
Step 1:
So, press Alt-F11 to go to the Visual Basic Editor. Go to the Insert Tab and choose Module.
Step 2:
Enter the following code.
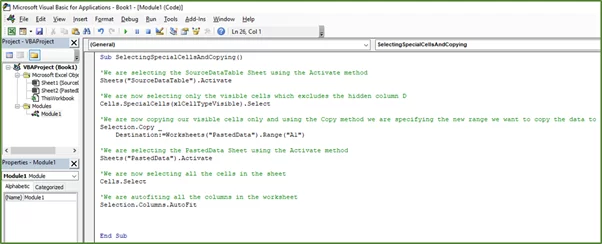
Sub SelectingSpecialCellsAndCopying()
‘We are selecting the SourceDataTable Sheet using the Activate method
Sheets(“SourceDataTable”).Activate
‘We are now selecting only the visible cells which excludes the hidden column D
Cells.SpecialCells(xlCellTypeVisible).Select
‘We are now copying our visible cells only and using the Copy method we are specifying the new range we want to copy the data to
Selection.Copy _
Destination:=Worksheets(“PastedData”).Range(“A1”)
‘We are selecting the PastedData Sheet using the Activate method
Sheets(“PastedData”).Activate
‘We are now selecting all the cells in the sheet
Cells.Select
‘We are autofiting all the columns in the worksheet
Selection.Columns.AutoFit
End Sub
Now with your cursor placed in the sub procedure code, press the F5 key on your keyboard to run the code.
The result is the following.
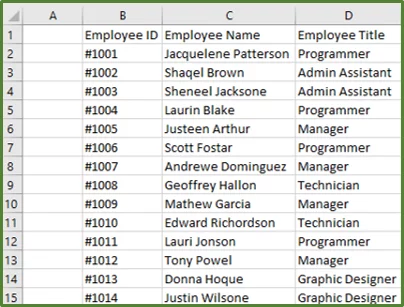
You can see that you can accomplish quite a bit, once you start using methods in your VBA code.
So it’s a good idea to practice using common methods, in your VBA code, in order to familiarise yourself with their syntax.
Pro Tip! If your Excel crashes (which sadly VBA can cause often!) you can always recover your unsaved files.
Handling Errors in VBA
Once you start writing code, you’ll find that you may encounter errors. This means that your code is not working in the way you expected it to/wanted it to.
Step 1:
For example, if we look at our blank cells example, after we run the code for the first time, we see the following.
Now if we run the code again by going to the Developer Tab, and in the Code Group, selecting Macros. Then choosing the SelectingSpecialCellsAndFormatting macro and clicking Run.
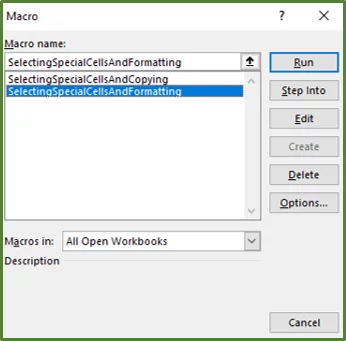
We will get the following error.
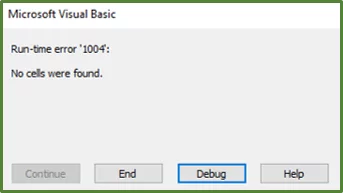
It’s basically saying that no blank cells were found. The reason being that we already ran the macro and now there are no blank cells in the range.
Step 2:
So, we have two options we can click End in which case the code stops running and the Error Message Dialog box disappears or we can click Debug.
If we click on the Debug button, we’ll be taken back to the VBE and we will see the following. The line that is causing the error is highlighted.
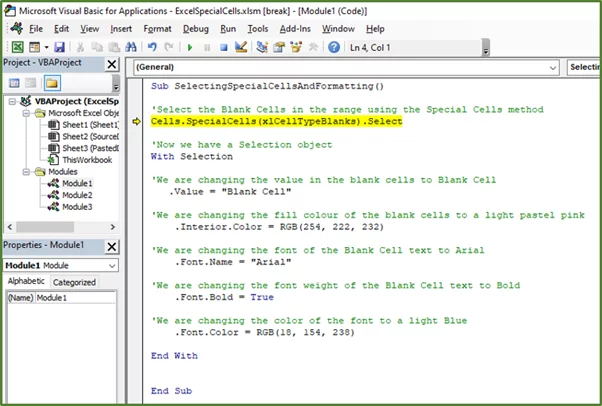
Press the Reset button to edit the code.

Step 3:
We will now look at handling the error. The Error Message VBA generates by default, is not very user-friendly and ideally we want to avoid it. In this case we are considering the situation where the code has already run and someone else is re-running the macro.
So, the main task in other words has already been accomplished and now we just want to avoid the error message and basically exit the sub procedure.
We can use this code.
Sub SelectingSpecialCellsAndFormatting()
‘We are saying that if an error occurs then go the ErrorHandler Label
On Error GoTo ErrorHandler
‘Select the Blank Cells in the range using the Special Cells method
Cells.SpecialCells(xlCellTypeBlanks).Select
‘Now we have a Selection object
With Selection
‘We are changing the value in the blank cells to Blank Cell
.Value = “Blank Cell”
‘We are changing the fill colour of the blank cells to a light pastel pink
.Interior.Color = RGB(254, 222, 232)
‘We are changing the font of the Blank Cell text to Arial
.Font.Name = “Arial”
‘We are changing the font weight of the Blank Cell text to Bold
.Font.Bold = True
‘We are changing the color of the font to a light Blue
.Font.Color = RGB(18, 154, 238)
End With
Exit Sub
‘This part of the code says that if there is an error then exit the sub procedure
ErrorHandler:
Exit Sub
End Sub
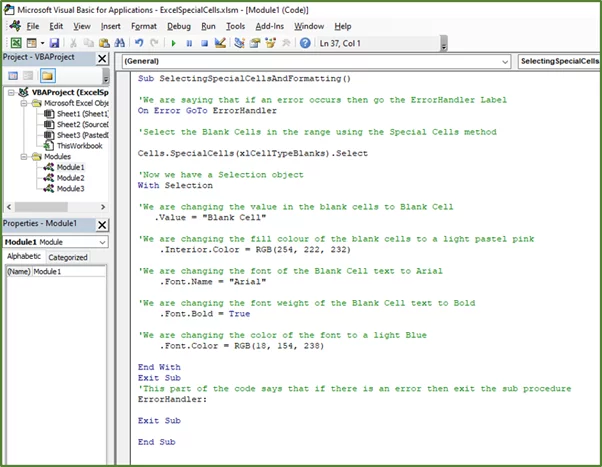
The On Error GoTo ErrorHandler statement has to be declared at the beginning of the code. This statement basically says if there is an error go to the ErrorHandler label. The ErrorHandler label then says if an Error occurs exit the sub procedure.
We are avoiding the error message.
Now of course, one won’t handle all errors in this way.
VBA provides other ways to handle errors which you can review as you start creating more complex VBA code.
Learning Objectives
You now know how to:
- Use the SpecialCells method in Excel to select cells that meet a certain criterion
- Make use of the Activate method and the Copy method
- Manipulate the Selection object
In addition you have an understanding of:
- What Error handling entails
Conclusion
It is important to start learning about VBA methods when you want to write functional code. The VBA Special Cells method in Excel, will allow you to select cells that meet a certain criteria.
Once you start writing code in earnest, you need to start thinking about handling errors and in this post we’ve gone over a simple way to handle errors generated.
Special thank you to Taryn Nefdt for collaborating on this article!


- Facebook: https://www.facebook.com/profile.php?id=100066814899655
- X (Twitter): https://twitter.com/AcuityTraining
- LinkedIn: https://www.linkedin.com/company/acuity-training/