
Creating A Simple Macro In Excel (Step-By-Step)
Contents
Creating a simple macro in Excel is easier than you think.
Now, it may seem contradictory, but you do not need to learn Visual Basic for Applications (VBA) to record simple macros in Excel.
VBA does, however, come in handy if you would like to write complex macros or edit existing macros.
To get started with Excel VBA, you can learn about it on our specialised courses.
What is a Macro?
Macros are blocks of code, which assist with automating tasks.
The word macro is short for macroinstruction. You can create a simple macro by using the Macro recorder, in which case Excel generates the VBA code for you.
A simple macro, created with the Macro recorder, should contain a series of steps that tells Excel how to accomplish a certain task.
A Useful Analogy When Conceptualizing Macros
Let’s say every day, a student makes his favourite omelette for breakfast. He first beats three eggs in a bowl. He then adds some butter to a frying pan and waits until the butter is melted.
He pours the eggs into the frying pan. He lets the eggs cook for a little bit. He then adds spinach, garlic and five sundried tomatoes to the eggs.
He lets this mixture cook for a little while and then slides the omelette onto a plate when ready.
Now let’s say this student doesn’t want to make breakfast for himself every morning. He wants someone else to make it for him, so that he can save time in the morning when he gets up, since his favourite omelette is ready.
Now in this context, you can think of a macro like a recipe in a way. Excel is the chef (seasoned professional) following the recipe, in order to create the omelette that this student would usually have to make for himself.
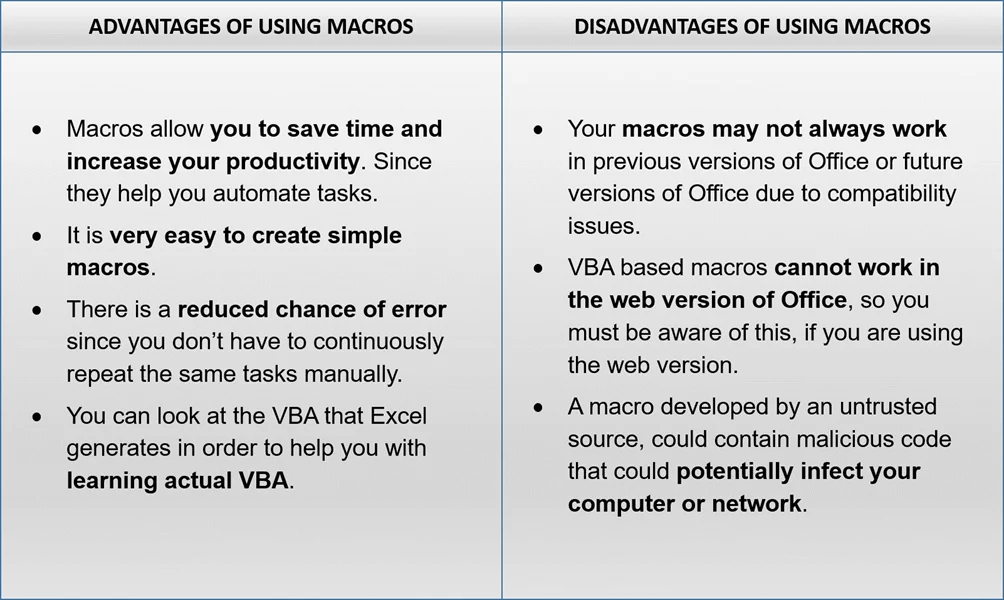
Advantages/Disadvantages of Macros
Let’s review some advantages and disadvantages of using macros in your workbooks.
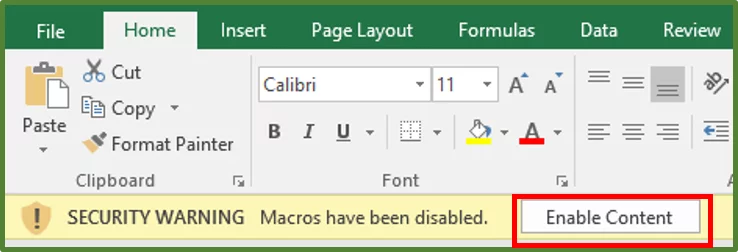
Due to the potential security risk, by default macros are not enabled. When opening a workbook containing macros, you will see a Security Warning.
Click on the Enable Content Button in order to enable macros in your workbook.
Creating a Simple Macro in Five Easy Steps
The scenario:
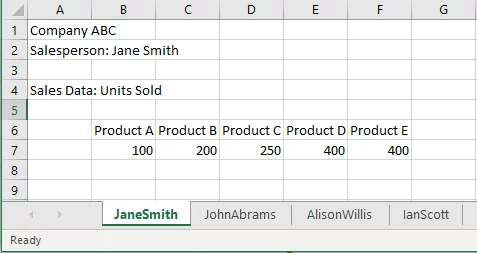
In our example, every week an office worker receives an Excel workbook. The workbook contains four worksheets with the weekly sales data of interest, for each salesperson.
There are a series of things she has to do formatting wise and it is the same for each sheet:
- She has to change the font size of the text in cell A1 to 14, and change the colour of the text in cell A1 to blue.
- She then has to select all the cells in the worksheet and AutoFit the Column Width.
- She then has to select cells B6:F7 and add simple borders around and inside cells B6:F7.
Since all the worksheets have the same structure and the steps are simple, she can record a macro to do this for her instead of doing it manually every time for each sheet.
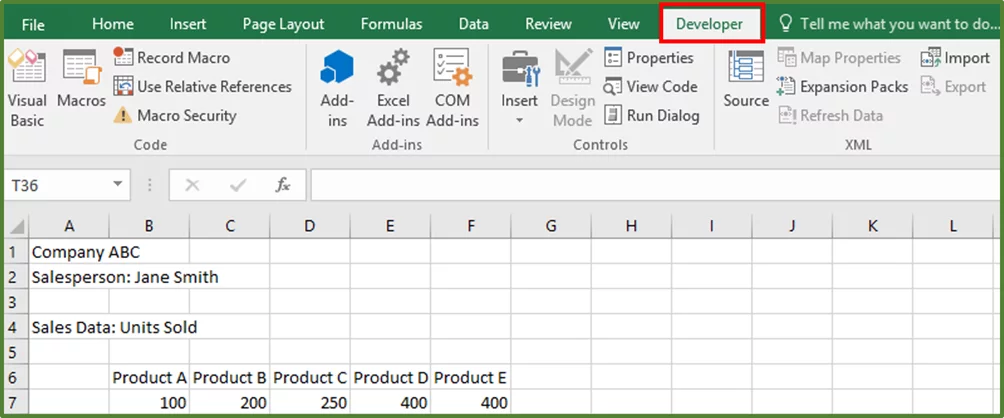
- Note: In order to set up a macro, you first have to make sure that you can see the Developer Tab on the Ribbon.
To do this, go to:
- File and select Options. The Excel Options Window should appear.
- Choose Customize Ribbon.
- On the right hand side, in the Main Tabs section check Developer.

- Click Ok.
- The Developer Tab should now be added to the ribbon.
The Steps:
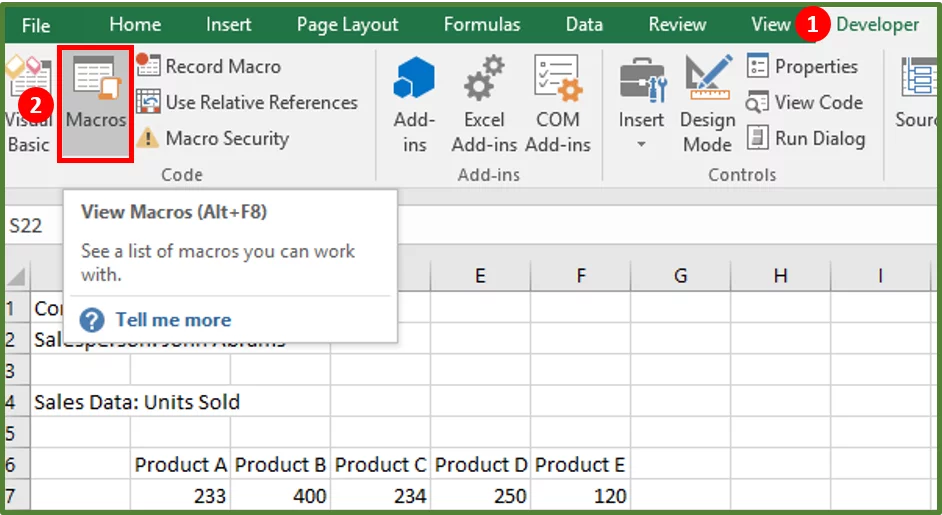
1) So on the sheet called JaneSmith select cell H10. Go to the Developer Tab on the Ribbon (Step 1 in the image).
In the Code group, click on Record Macro (Step 2 in the image).

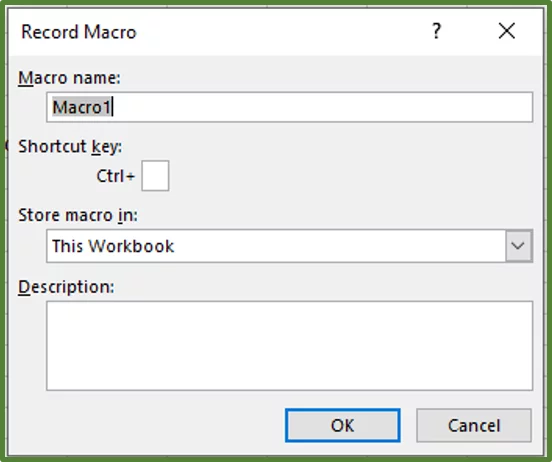
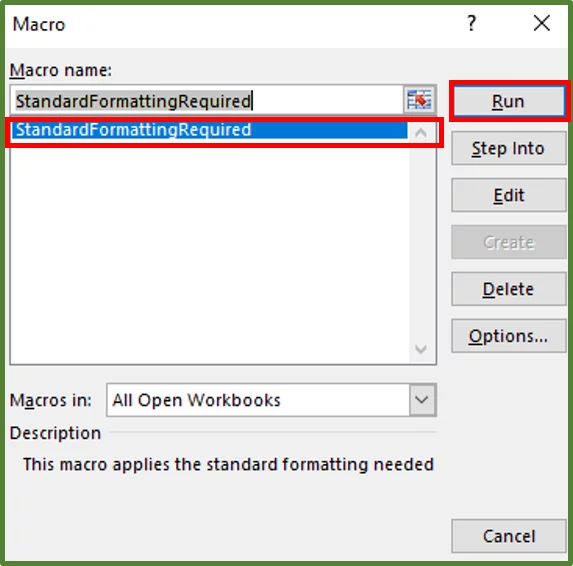
2) The Record Macro Dialog Box will appear.
Enter a name for your macro, which in this case is StandardFormattingRequired.
- Note: When naming a macro, remember that the name cannot contain spaces. The macro name also has to start with a letter.
Assign a shortcut key, use Ctrl-Shift-B in this case.
- Note: When assigning a shortcut key, do not use existing common shortcuts such as Ctrl-S, Ctrl-Z, Ctrl-A and Ctrl-C or else Excel will overwrite these shortcuts.
Choose where you would like to store your macro.
- Note: You have three options. If you choose This Workbook, you can use the macro in the current workbook you are working in.
- However, if you choose New Workbook, Excel will store the macro in another new workbook.
- If you choose your Personal Macro Workbook (personal.xlsb) then your macro will be available in any workbook that you open in Excel.
We will choose This Workbook.
Enter a description for your macro. This is optional but helpful if you are sharing your workbook with other colleagues.
In this case, type “This macro applies the standard formatting needed.”
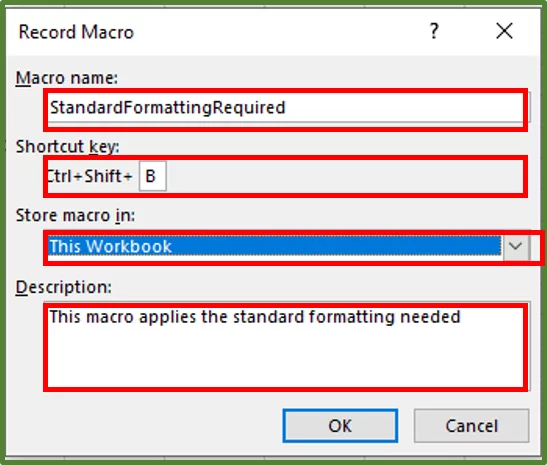
Click Ok.
3)
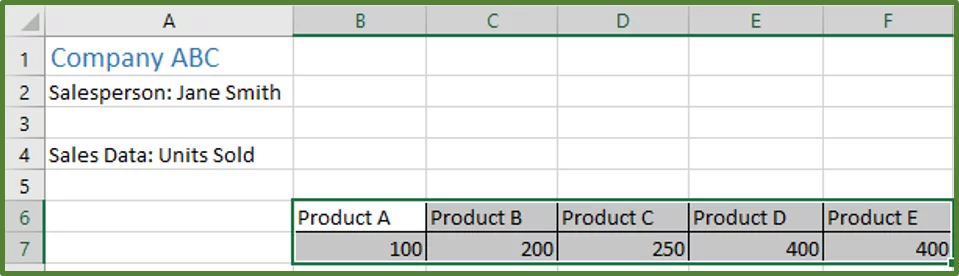
- Now select cell A1 and change the font size to 14. Change the text colour to blue.
- Select all the cells in the worksheet by pressing the Select All button. Then go to the Home Tab and in the Cells group, click Format. Choose AutoFit Column Width.
- Select cells B6:F7 and go to the Home tab, and in the Font group, select the drop down arrow next to Borders. Select All Borders.
The result is shown below.
4) Once you’ve completed the formatting go to the Developer Tab on the Ribbon (Step 1 in the image), in the Code group click on Stop Recording (Step 2 in the image).

5) Now save the file by going to File and clicking on Save As. Once you have selected a location. Give your workbook a name.
Instead of saving the workbook as a standard Excel workbook, choose Excel Macro-enabled Workbook in the Save as type: section and click Save.

- Tip: Remember that Excel records all keystrokes and clicks, once you start recording. So it’s advisable to think about what you want to do first, so that Excel does not record unnecessary clicks.
For example, let’s say you changed the font colour to orange first and then blue.
Excel would record this and while it won’t affect the functionality of your macro, there will be unnecessary lines of code generated.
Another frequent use of macros is to carry out repetitive formatting tasks like highlighting duplicate values in cells and creating tables.
Running a Simple Macro
We want to see if the macro we just created works.
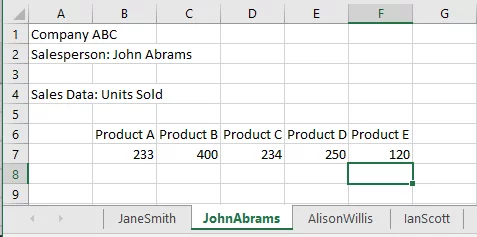
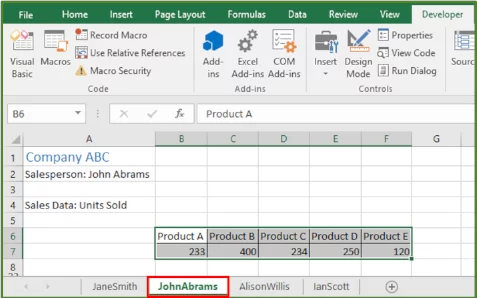
1) So go to the sheet called JohnAbrams.
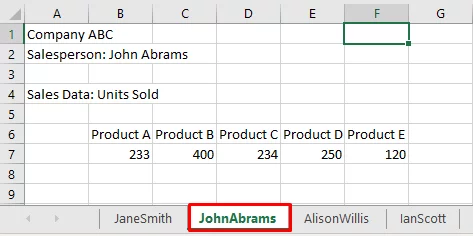
2) On the Developer Tab (Step 1 in the image), in the Code group click Macros (Step 2 in the image).
You should see the Macro Dialog Box.
The name of the macro we just created should be there. With this macro selected. Click Run.
Now this sheet should be formatted in exactly the same way that the previous sheet was.
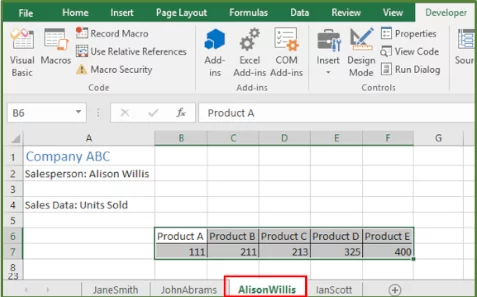
3) Now go to the sheet called AlisonWillis and this time press the shortcut key we assigned to the macro which was Ctrl-Shift-B.
The result is shown below.
Tips for Creating Simple Macros
- Know what you would like to accomplish upfront so that Excel does not generate unnecessary lines of code.
- Once you are comfortable with creating macros, use relative references rather than absolute references.
Learning Objectives
Let’s review the skills you have learned:
- You know what a macro is.
- You have learned to think about the logical steps involved in creating a simple macro.
- You have learned how to record your own simple macro.
- You have learned how to run a macro.
- You have learned how to assign a macro to a button.
- You have learned how to assign a macro to the Quick Access Toolbar.
- You know how to save Excel workbooks as macro-enabled workbooks.
Conclusion
Macros are extremely useful for speeding up your work flow in Excel and increasing productivity.
If you would like to continue your VBA journey and learn about how to create more complex macros, then please see our Microsoft Excel VBA course!
Special thank you to Taryn Nefdt for collaborating on this article!


- Facebook: https://www.facebook.com/profile.php?id=100066814899655
- X (Twitter): https://twitter.com/AcuityTraining
- LinkedIn: https://www.linkedin.com/company/acuity-training/