
Introduction to VBA [Step-By-Step Guide]
Contents
VBA stands for Visual Basic for Applications. It is an object-orientated, event driven programming language.
The VBA language can sound intimidating, but this step-by-step guide will walk you through each step smoothly.
This article is an Excel VBA Tutorial appropriate for all levels!
Learning how to write vba code will help you sort out data, automate some of your workflow and create custom functions. All of this will come together to help you work more efficiently.
You can use VBA in Office applications such as Excel, Word, Access, Outlook and PowerPoint.
We also run VBA Courses to get you all caught up! Even if you are brand new, it will make writing code seamless!
What is VBA in Excel and why should you learn it?
VBA Excel is especially useful, as you can use it to:
Automate workflows, develop user defined functions, and customize the Office Ribbon.
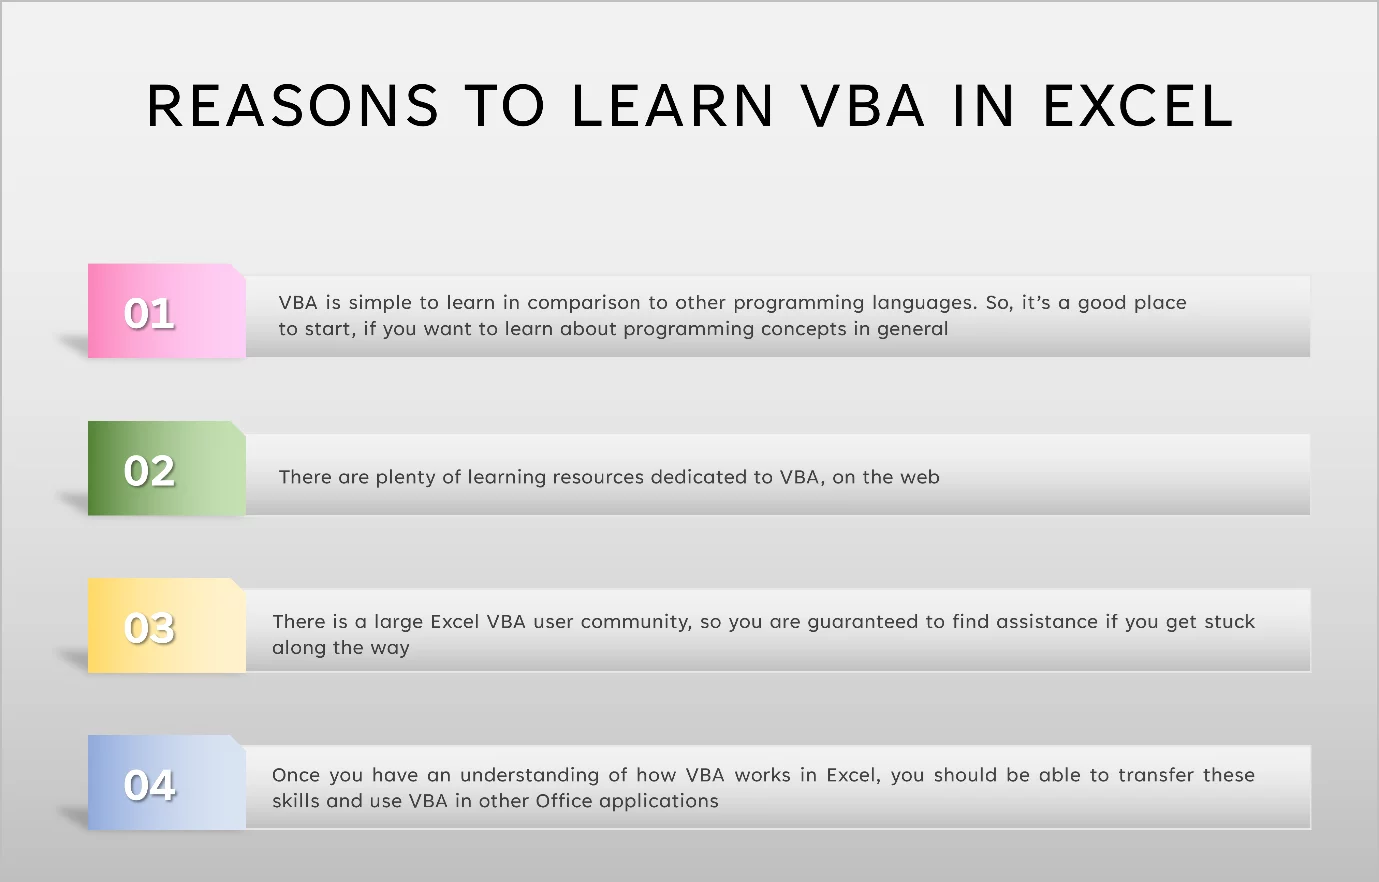
Let’s look at a few reasons why you should consider learning VBA in Excel.
However, before you dive into learning VBA, you should have a fairly advanced knowledge of Excel’s existing capabilities. Since you don’t want to reinvent the wheel and ultimately you should use VBA to save time and not replicate features that are already built-in to Excel.
Also bear in mind, you cannot develop standalone applications with VBA, so you will always need a host application to run your VBA code.
VBA will particularly help you with data analysis, one of its most powerful capabilities.
Where to Code with VBA?
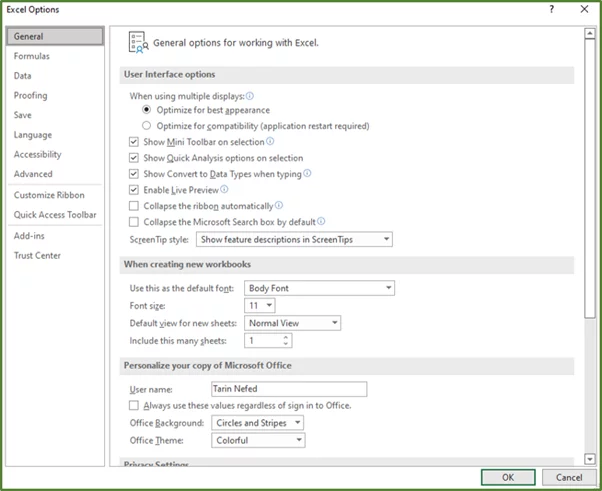
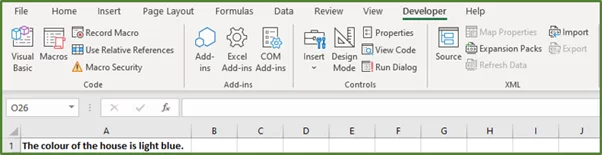
The Visual Basic Editor comes with Excel, so you don’t need to download or install any additional software. This is where you will write your code. To get started you need to add the Developer Tab to the Ribbon.
1) So, go to the File Tab and select Options.
2) You should see the Excel Options Window.
3) Select Customize Ribbon.
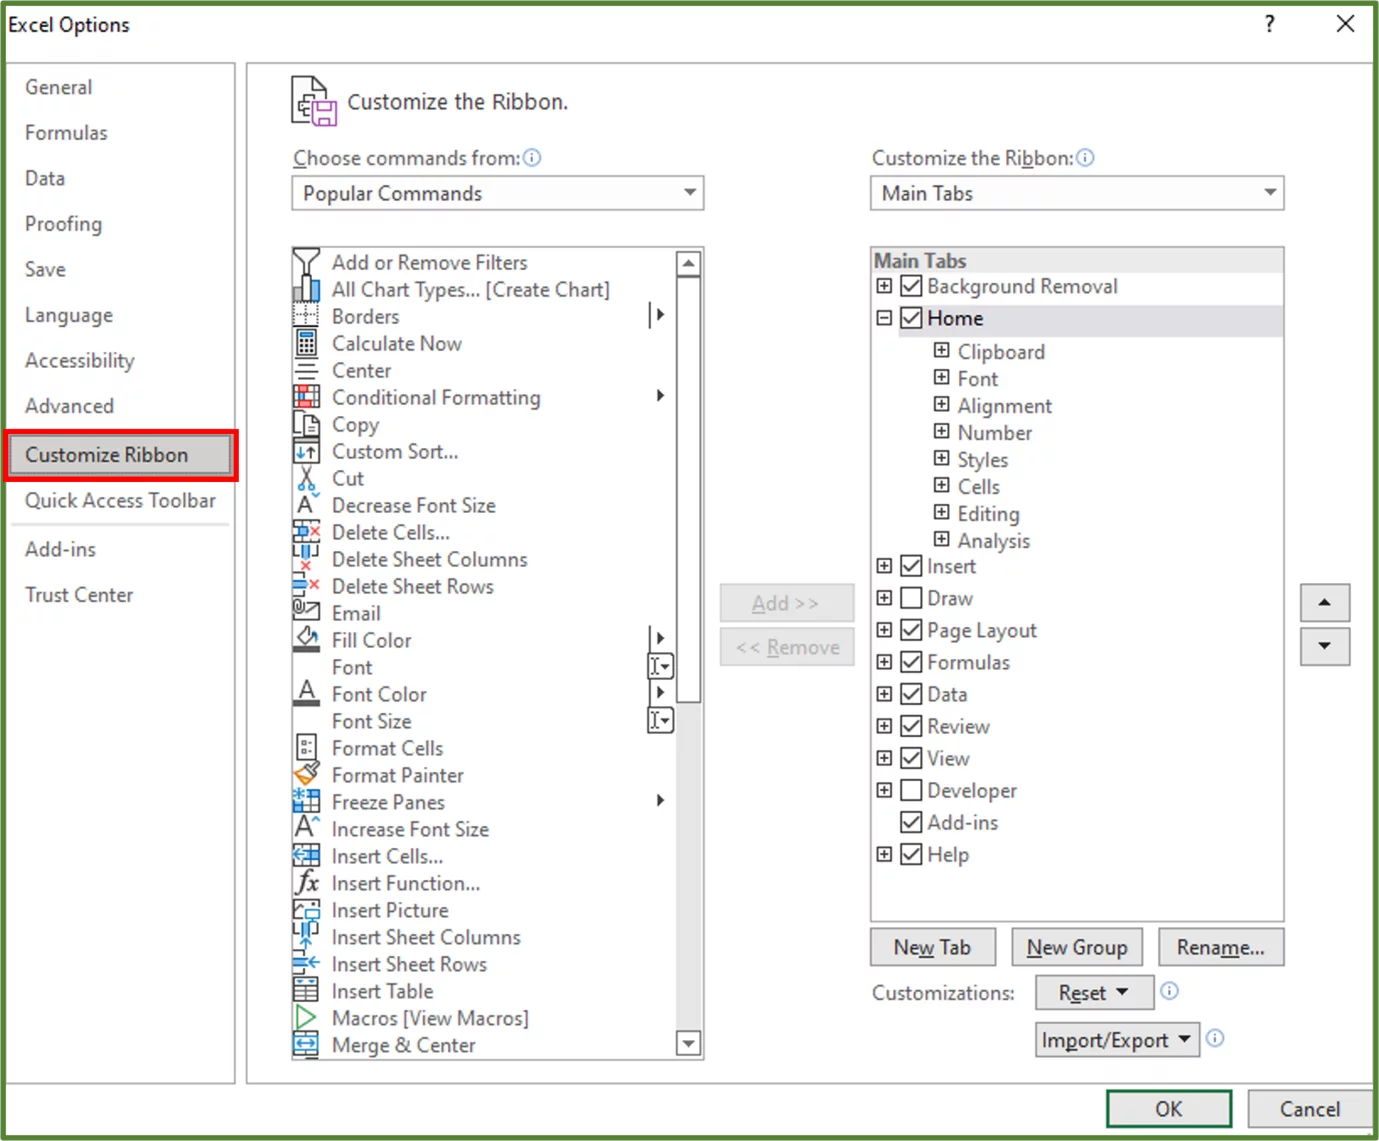
4) In the Main Tabs Section, select the Developer Tab check box.
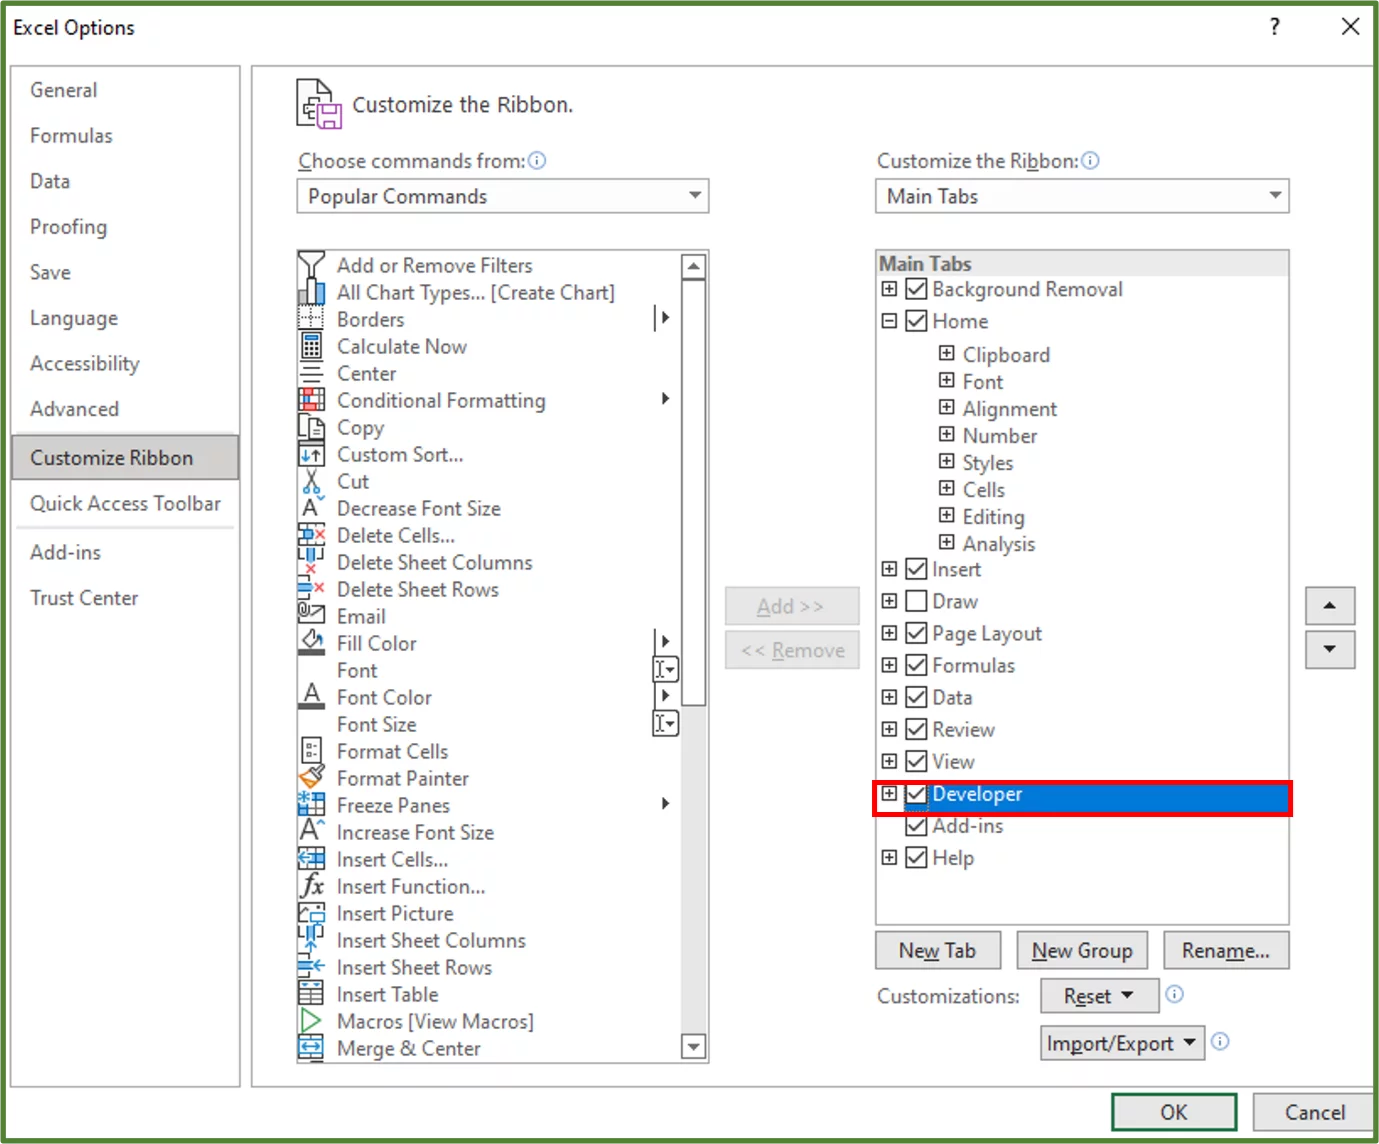
5) Click Ok.
6) You should see that the Developer Tab has been added to the Ribbon.

You can utilize the Developer Tab to:
- Record a VBA macro
- Access macros that you created previously and run them
- Go to the Visual Basic Editor
- Get Add-Ins that you can download from the Office store
- Insert Form Controls such as buttons and textboxes in your worksheet
- Insert ActiveX Controls
- Use XML commands
Accessing the Visual Basic Editor
1) To access it, go the Code Group on the Developer Tab and click on the VB Option.

2) You should see the following.

Tip: You can use the shortcut key ALT-F11 to access the VB Editor.
This is a great way to streamline your workflow – just like automatically removing blank rows.
The VBA Object Model in Excel
When coding in Microsoft Excel VBA, you will be working with objects. An object is an element that you work with and manipulate in some way through your code.
Examples of objects in Excel are:
- The actual Excel application
- A workbook
- A worksheet
- A range of cells
- A cell
- A hyperlink
- A Pivot Table
The VBA object model in Excel refers to the hierarchy of these objects. Objects contain other objects. The Workbooks object, for example contains the Worksheets and VBA Projects objects. An overview of the hierarchy is shown in the diagram below.
Objects have properties which are attributes or characteristics. For example, an object can have a colour – this would be a property or a characteristic of an object. Objects also have methods, which are actions associated with these objects.
For example, you can copy a value. This would be an example of a method. Some methods have parameters. These parameters can be optional or mandatory.
A useful analogy when conceptualizing objects, is to look at the example of a real-life house. The house is an object. It can have a property as in the colour it is painted. The house can also be cleaned or painted which are two methods/actions associated with houses.
What to Code?
Now that we have covered some useful theory, let’s look at writing some VBA code.
Changing the Text Weight in a Cell to Bold Using VBA – A simple example
VBA can even be used to adjust font formatting!
In this example, we are working with the range object and the font object.
We are setting the bold property of the font object to true.
1) We have some text in cell A1 on Sheet1.

2) To change the text weight of this text to bold using VBA, go the Code Group on the Developer Tab and click on the VB Option.
3) Go to the Insert Tab and choose Module.
4) Enter the following code in the message box to create a sub procedure.
Sub MakingTextBold()
End Sub
- Note: You enter the VBA code to make the text in cell A1 bold, in the sub procedure. You must give the sub procedure a name – in this case it is MakingTextBold.
- Note: It is also a good idea to add comments to your code. Comments help you to annotate your code, and you can describe what is happening in each portion of your code by using comments.
VBA does not execute comments. The way to add a comment is to type an apostrophe and then the comment itself. The text colour of comments is green.
We are going to use comments to explain our code.
5) Type the following code.
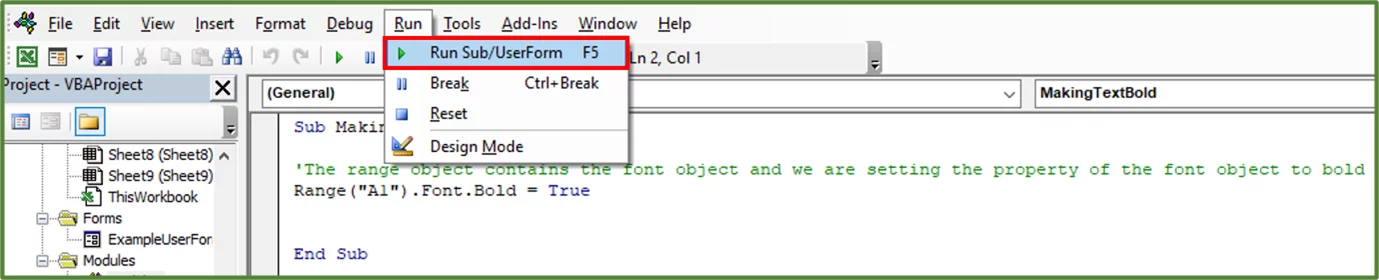
‘The range object contains the font object and we are setting the property of the font object to bold
Range(“A1”).Font.Bold = True
6) To run the code, place the cursor in the sub procedure and go to the Run Tab and choose the Run Sub/UserForm option.
7) The result is the following. The text weight in cell A1 has been changed to bold.
There you have it, you have just written your first VBA code.
Now you may be thinking that it doesn’t take that much time to change the font to bold in Excel, by going to the Font group on the Home Tab. So, let’s look at a slightly more complex example, building on what we have learned, to demonstrate how VBA can be used to save time.
If you want to learn about how you can link data to another worksheet instead of adding multiple sheets to one workbook.
Adding multiple sheets to a workbook at once Using VBA– A more complex example
Let’s say you needed to add multiple sheets to a workbook.
In our example, we need to add thirty sheets to the workbook. We can do this with a single line of code using VBA.
1) Go the Code Group on the Developer Tab and click on the VB Option.
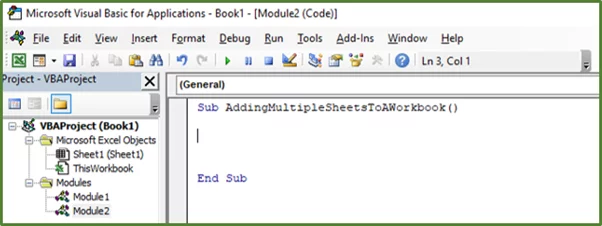
2) Go to the Insert Tab and choose Module.
3) Create the sub procedure.
Sub AddingMultipleSheetsToAWorkbook()
End Sub
4) Type the following lines of code.
‘We are using the Add method of our Sheets object to add the new sheets as well as specifying the number of sheets to be added
‘through the Count Parameter
Sheets.Add Count:=30
‘through the Count Parameter
Sheets.Add Count:=30

5) To run the code, place your cursor in the sub procedure and press F5 on your keyboard.
You should see 30 new sheets added to your workbook.
- You can see and access the two macros we just created by going to the Developer Tab and in the Code Group click on the Macros option.

The Macro Dialog Box will appear. From here you can select one of the macros and either edit or run the macro again if needed.

- You will need to save your workbook as a macro-enabled workbook. To do this go to File and select Save As.
Browse to your location of choice. Using the Save As Dialog Box, give your workbook a name and in the Save as type: choose Excel Macro-Enabled Workbook.

Click Save.
Excel VBA Use Cases
There are many practical applications of Microsoft Excel VBA.
- As we have seen, you can use VBA to insert multiple worksheets at once.
- However, you could also use VBA to first prompt the user of your workbook for input and ask them how many sheets they would like to insert.
- Your code would need to be adjusted slightly to accommodate the user input.
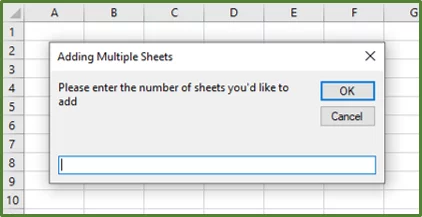
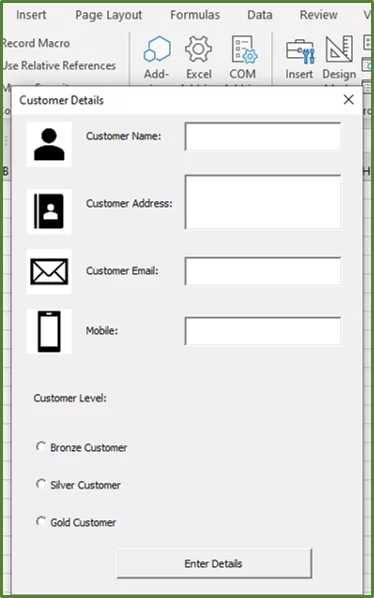
- You can create a UserForm similar to the kinds that one sees on web pages, with text boxes and radio buttons for data entry in VBA.
Learning Objectives
You now know how to:
- Add the Developer Tab to the Ribbon
- Access the VB Editor
- Make text bold using VBA
- Add multiple worksheets to a workbook using VBA
- Annotate your VBA code with comments
- Save your workbook as a macro-enabled workbook
Additionally you have an understanding of:
- The Excel VBA Object Model
- What an object is
- What a property of an object is and a method
Conclusion
VBA allows you to program repetitive tasks or create custom functions and has a myriad of other uses.
If you’re an advanced Excel user, you should consider learning VBA to automate repetitive processes and enhance your spreadsheets and dashboards.
This is one of the most powerful microsoft office applications, so take it slow when learning! Feel free to refer back to this VBA tutorial whenever you need.


- Facebook: https://www.facebook.com/profile.php?id=100066814899655
- X (Twitter): https://twitter.com/AcuityTraining
- LinkedIn: https://www.linkedin.com/company/acuity-training/