
A Complete Guide To SharePoint Lists
Contents
- 1 What is a List in SharePoint Online?
- 2 SharePoint Lists vs SharePoint Libraries
- 3 Creating a Simple SharePoint List
- 4 Creating a Custom SharePoint List
- 5 Changing The Name And Description Of A SharePoint List
- 6 Adjusting A SharePoint List’s Other Settings
- 7 Deleting a SharePoint List
- 8 Restoring Deleted List Items
- 9 Conclusion
Microsoft added SharePoint Lists to the 2016 version of Microsoft SharePoint.
They are designed for tracking and managing data and look similar to spreadsheets.
For many applications, for example, displaying data when tracking software bugs or a task list, a SharePoint List is a far better solution than a Microsoft Excel spreadsheet.
SharePoint Lists have a user-friendly interface that effectively organises, displays, and updates data. They allow for selective data access, which helps to maintain data integrity.
If you’re still learning SharePoint it is important to understand how to use them.
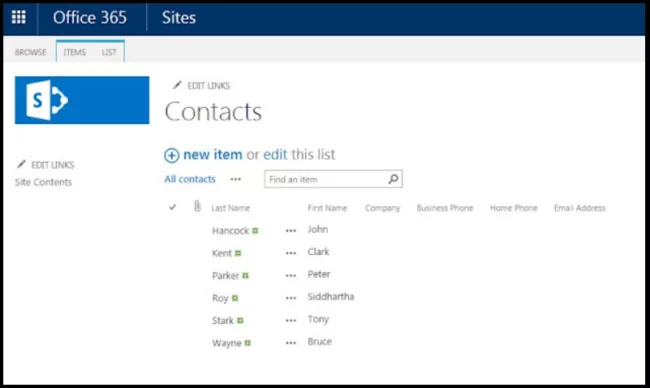
A list in SharePoint Online is a collection of data displayed in rows and columns.
It is very similar to a spreadsheet or a simple database.
The rows in a list are called list items.
The columns can be called fields, properties, or metadata.
SharePoint includes a wide variety of templates for creating different types of lists such as:
- Tasks,
- Calendars
- Surveys
- Discussion boards
- Contact
You can also create a customised list from scratch if no template suits your purpose.
Note: There is a Microsoft Lists app which means you can access your lists via a mobile app. If you create a list in Microsoft Teams, Microsoft Teams will save the list in SharePoint.
Let’s look at the differences between SharePoint document libraries and SharePoint lists.
The difference is important when you are planning and creating a SharePoint site.
| CRITERIA | LISTS | LIBRARIES |
|---|---|---|
| Attachment Types | A SharePoint List is a web-based adjustable table used to store data and which can accommodate a variety of attachments. | A SharePoint Library is a special type of List that can accommodate only one file type. |
| Versioning | SharePoint Lists can only contain major (published) versions. | A SharePoint library can contain minor (drafts) and major (published) versions. |
| Check-In/Check-Out | A SharePoint list does not have a check-in/check-out feature. | A SharePoint library does have a check-in/check-out feature. |
| Typical Uses | Creating lists to track issues, value changes and organise information. | Document libraries, storing standard operating procedures. |
Creating a SharePoint list is simple.
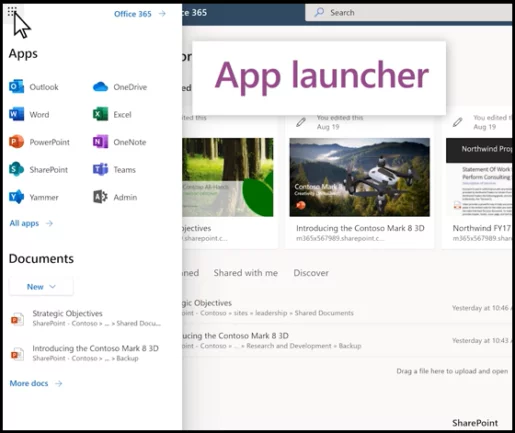
- First, select the All apps option from the Microsoft 365 App launcher.
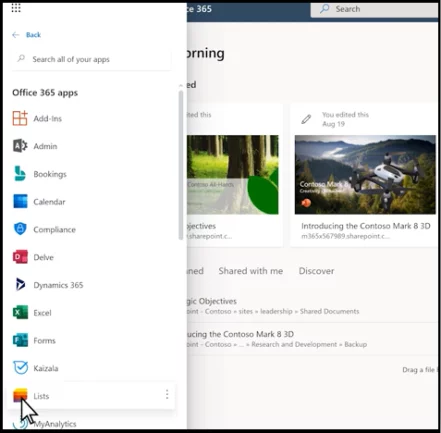
- Then, select the Lists app from the given options.
- Once the Lists app has opened, select the +New list option.
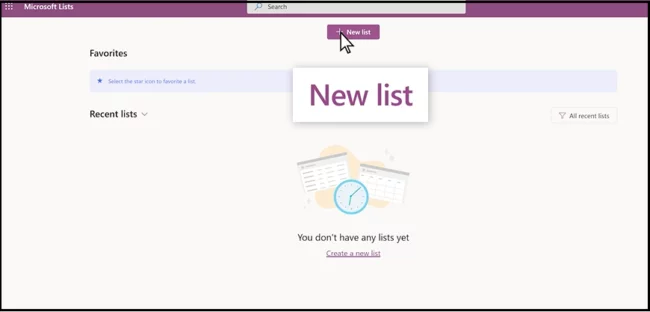
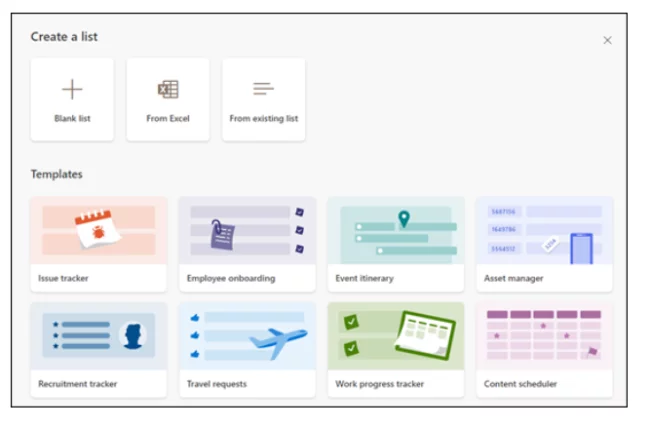
- After clicking on the +New list option, you will see the Create a listing page.
This page contains a number of different standard templates. If you find a template you like, click on it to create a new list.
- When your List opens, you can add items by selecting the +New option in the top-left corner.

Creating a custom SharePoint List is also very simple.
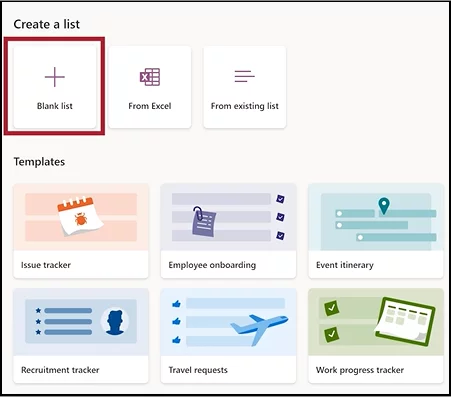
- Select +New List from the Lists app in Office 365.
- From the Create a list page, select Blank List. This choice will allow you to create a customised list from scratch.
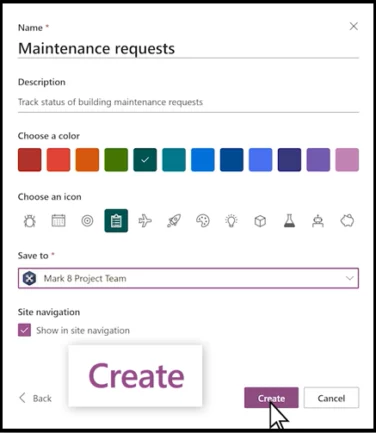
- You will now be asked to add a Name and Description (optional) for your list and select whether you want the list to appear in the left side navigation.
After choosing all the options, select Create.
To change the name and description of a SharePoint List, you can follow the simple steps mentioned below:
- First, choose the Settings option from the drop-down list you wish to edit and select List Settings.
- From the General settings page, choose List name, description, and navigation.
- Now, you will see editable sections of name and description.

- After changing the name and description of the SharePoint List, click on Save to, and SharePoint will update to your preferred settings.
To adjust a List’s settings:
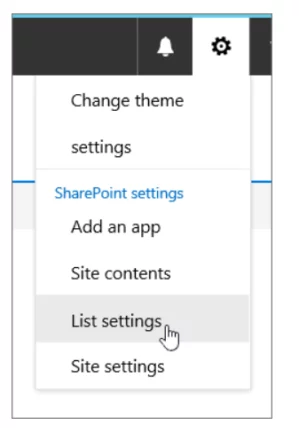
- Click on the Settings option under the gear wheel in the top right of your screen.
Select List Settings from the List you wish to edit.
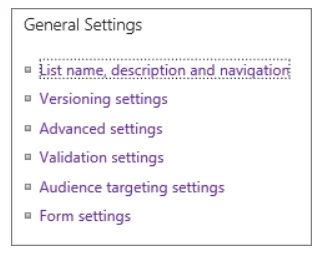
- You will now see the General settings option for your list.
It contains a number of different section headings, including name, description, versioning and validation.
All of these settings will allow changes and additions to your List.
For example, Versioning settings allows you to control who and how changes can be made to documents. They all you to determine who can view, edit and approve draft items. They also let you control who can create new versions when editing a document.
Turning on versioning will make collaborative tasks like document review, co-authoring, and List updates more straightforward with your colleagues.
NOTE: SharePoint users must have the Manage Lists permission to turn on versioning.
In the Advanced settings option, you can manage content types, enable attachments, launch forms in dialogue, etc.
Audience targeting settings allows you to filter list contents based on a users’ context.
Once you have completed your changes, return to your list, and you will see that it is updated.
To delete a SharePoint List:
- First, select the list you want to delete.
- Then, click on the Settings option and choose List settings.
- Select the Delete this list on the Permissions and Management page.
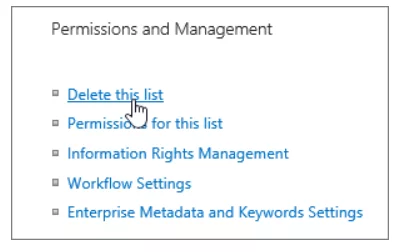
- Now, a confirmation dialogue will pop up; select OK.
Restoring Deleted List Items
Items deleted from a SharePoint list aren’t deleted permanently and can be restored.
Deleted items are moved to the SharePoint site recycle bin for period (usually 91 days) before they are permanently deleted.
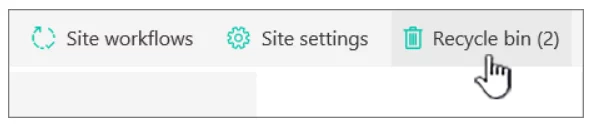
To restore a deleted list item from the recycle bin of SharePoint:
Open the SharePoint site from which the items were deleted.
Click Recycle Bin from the Quick Launch bar navigation on the bottom left of the screen.
If the Recycle Bin option is not present on the Quick Launch bar, click Settings and select Site contents. You will find the recycle bin in the top right portion of the Site Contents page. You will now see the Recycle bin and be able to restore as usual.
Now that you can see the Recycle bin page select the boxes to the left of the items or files you want to restore.
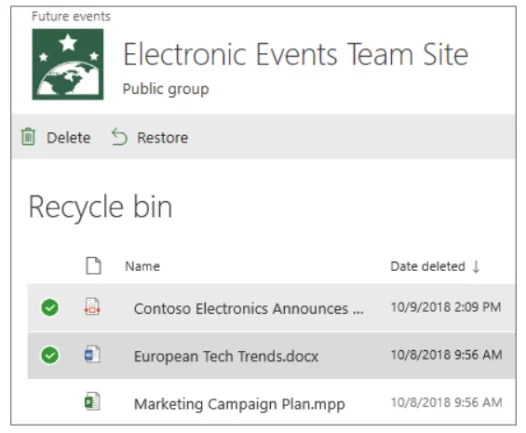
After choosing the desired files, click Restore.
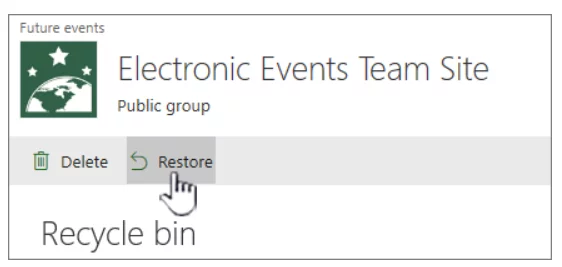
The restored items will now be restored to the location you deleted them from.
Conclusion
SharePoint Lists are an excellent feature of Microsoft 365 that has made organising and sharing data a piece of cake.
Hopefully, you will now be comfortable creating and managing one and will use them far more.
- Facebook: https://www.facebook.com/profile.php?id=100066814899655
- X (Twitter): https://twitter.com/AcuityTraining
- LinkedIn: https://www.linkedin.com/company/acuity-training/