
Why Are My InDesign Images Fuzzy?
When I started using InDesign, I thought something was wrong.
All my images were blurry and low-res. I couldn’t understand what was going on.
It turns out that this is a great feature of InDesign’s once you have learned more about InDesign.
One book might contain thousands of images.
If they were all visible at full resolution in InDesign, InDesign would work verrry slowly.
To avoid this, InDesign displays your images at low resolution while you are working on it.
However, when your document is rendered, it will use high-resolution images so that they are produced at full quality.
Sometimes you actually want to see your full-resolution images.
Let’s look at some ways to deal with this.
DISPLAY PERFORMANCE
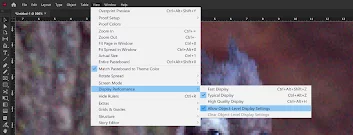
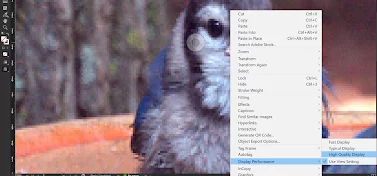
If you click View in the toolbar at the top of the screen, you will see an option called Display Performance.
Bringing your mouse down to it will reveal 3 options:
-Fast Display
-Typical Display
-High-Quality Display
You will also see 2 options below those:
-Allow Object-Level Display Settings
-Clear Object-Level Display Settings
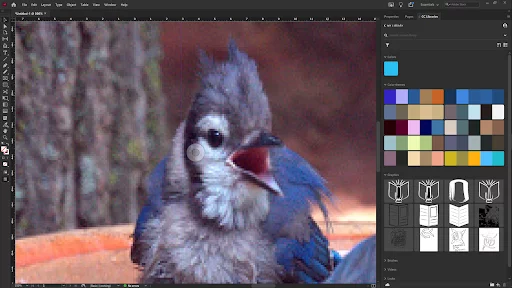
As you can probably guess, “Typical Display” is the default display. It is the option that keeps your images fuzzy when you are looking at them in InDesign.
See below a typical example of this.
If your images are fuzzy on InDesign, the simplest thing to do is to click View > Display Performance > High-Quality Display.
Let’s look at the other options in more detail.
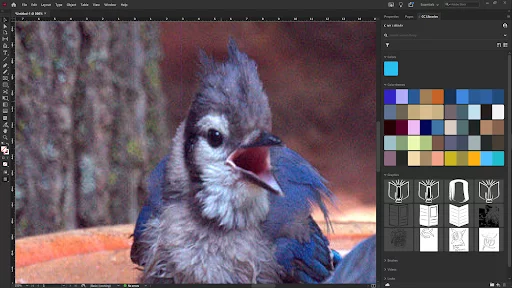
1. High-Quality Display
For example, if your images contain small text, you will want to select “High-Quality Display” so that you can view your images in a higher resolution.
Obviously, if your computer is outdated or slow and you are going through a large InDesign document, switching to the “High-Quality Display” option will slow you down enormously.
This is why Adobe gives us the option to fine-tune the settings for all 3 Display Performance options.
If you click Edit > Preferences > Display Performance, a Window will come up with sliders allowing you to adjust and fine-tune settings for each Display Performance Option.

You will also notice an option at the top of the window that allows you to select your default Display Performance mode.
If you click the “Adjust View Setting” drop-down menu, and select “High-Quality”, you will notice all the sliders are all the way towards the right, towards higher performance.
Adjusting these sliders will help you can find the best balance between quality and performance.
Sometimes, you only need certain specific images to be high-quality.
In this case, the best thing to do is to set only those specific images at high resolution.
We look at that later in this article.
2. Fast-Display
Just as we might want to see the images in our InDesign document at a higher resolution, we may also want the opposite: to sacrifice resolution in favour of optimizing InDesign’s performance.
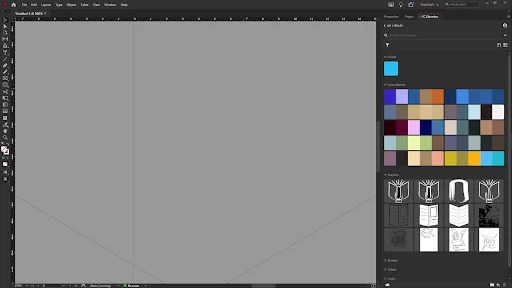
Instead of a high-quality image, or even a blurry one, the “Fast-Display” option replaces our images with a grey box.
This will speed up InDesign hugely, and so is very valuable when working with very large documents or an outdated PC.
To apply Fast-Display to the images in your document, click View > Display Performance > Fast Display.
OBJECT-LEVEL DISPLAY
We know how to apply Display Performance settings to images across an entire InDesign document, but what if you have hundreds and hundreds of images in your document?
Turning on High-Quality Display might crash your InDesign!
To get around this, InDesign allows you to apply different Display Performance settings to different images in your document.
For example, you could keep all of your images on Typical Display except for a few which you want at higher resolution.
InDesign refers to this feature as “Object-Level Display”.
To make sure the feature is enabled, click View > Display Performance, and then make sure that “Allow Object-Level Display Settings” is selected.
Now you have the freedom to apply specific Display Performance settings to different images in your document.
Click an image whose Display Performance setting you wish to change, right-click, and in the right-click menu, move your pointer to the “Display Performance” option.
As usual, you will see the three Display Performance options: Fast Display, Typical Display, and High-Quality Display.
Now selecting one of these options will affect only the image selected.
You can also select “Use View Setting” to keep the selected image linked to the default Display Performance setting.
This means that if the default Display Performance setting for the document is changed, the view setting for this image will also change.
Going to View > Display Performance, and then clicking on “Clear Object-Level Display Settings” will reset all images to the default Display Performance view.
Hopefully, you found this InDesign tutorial helpful.
Other Useful InDesign Tutorials
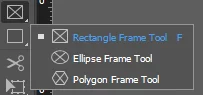
Using The Frames And Shapes Tool In InDesign
How To Number Pages In InDesign
How To Change The Bullet Character In InDesign
How To Remove White Background In InDesign

- Facebook: https://www.facebook.com/profile.php?id=100066814899655
- X (Twitter): https://twitter.com/AcuityTraining
- LinkedIn: https://www.linkedin.com/company/acuity-training/