
[Ultimate Guide] Approvals In Power Automate
Contents
An approval process is a sequence of steps involved in officially validating work and is done by a certain predefined authority. It may involve multiple stakeholders across different departments and is an integral part of every organization.
Automating the approval process helps in improving the efficiency and avoiding delays. This article explains in detail how Power Automate approvals can help automate such processes systematically.
In our Power Automate courses, we go over this process and much more, and you’ll be able to learn with the help of an expert trainer.
What Is An Approval In Power Automate
An approval in Power Automate is a connector which provides actions that can be used to create and automate an approval process. There are three approval actions available.
- Create an approval – This action starts an approval process but the flow execution does not stop at this point. The next steps are executed by the flow.
- Start and wait for an approval – This action starts an approval process and waits until the assigned user takes some action before proceeding to the next step in the flow.
- Wait for an approval – This action waits till a response(s) is(are) received from an already started approval.
Among these actions, ‘Start and wait for an approval’ is the most widely used approval action. We will discuss this action in detail, later in this article.
Why Might You Use An Approval?
In everyday business, we come across numerous scenarios where reviews and approvals are required. A manual approval process and tracking its different stages can be cumbersome as the approval chain may comprise multiple reviewers from across divisions within an organization. There is a huge scope for miscommunication and errors resulting in loss of overall productivity.
Power Automate approval flows help overcome the drawbacks of manual approvals. And it can be used to create approval flows in almost all business scenarios.
Here are a few examples of approval workflows:
- Leave request approval.
- Document reviews.
- Purchase requests and billing approvals.
- Approvals across multiple departments during onboarding/offboarding.
- Travel request approval.
- Budget approval
Different Types Of Approvals In Power Automate
The capabilities of Power Automate in automating business processes are vast as we can see below. Here are the different types of approvals that can be created.
- Create process approval flows – Some approval workflows might require multiple levels of approval. It can be one of the following:
- Sequential approval – An approval flow where multiple approvers review one after the other sequentially before it reaches the final approver for sign-off. This can be achieved using multiple Start and wait for an approval actions in sequence.
Example: A new business proposal or idea might require approval first from the team leader and then the manager before submitting it to the director of the organisation for final approval.
-
- Parallel approval – An approval flow where approvals from multiple stakeholders can happen independently. This can be achieved by creating parallel blocks and using Start and wait for an approval or Create an approval action in each of these parallel blocks.
Example: Approvals from multiple departments like HR, Finance, etc. during an employee offboarding process.
- Create document approval flows – Document approval requests are a crucial part of project management. From simple reviews within a team to formal sign-offs between organizations, this is the most common workflow process.
Example: For simple approve/ reject workflows for documents uploaded to a document library in SharePoint, there is built-in approval flow leveraging Power Automate. The user can request sign-off by assigning approvers.
If you would like to explore Power Automate Triggers, check out our guide.
Different Ways of Responding To Approvals By Approvers
The approvers of an approval workflow in Power Automate receive a notification in the form of a Power Automate email and a push notification if the approver has the Power Automate mobile app. Responding to an approval request can be done in any one of the below-mentioned ways.
- Through email – A response can be selected directly from the email notification. Comments can also be entered before confirming the response.
- Through the Power Automate portal – The pending approvals can be viewed in the Approval section in Power Automate where the approver can select a response, add comments optionally and confirm.
Additionally, the approver can also reassign to a different approver.
- Through Power Automate mobile app – If the approver has the Power Automate mobile app installed on the mobile phone, an approval response can be selected and comments can be entered by navigating to the Approvals section in the app.
A Simple Example Of An Approval In Action
Let us now see how to use Power Automate for approval using the “Start and wait for an approval” approval action and understand the different configuration options. We will request a document approval by sending a file stored in OneDrive as an attachment.
Step 1: Create An Approval Flow In Power Automate
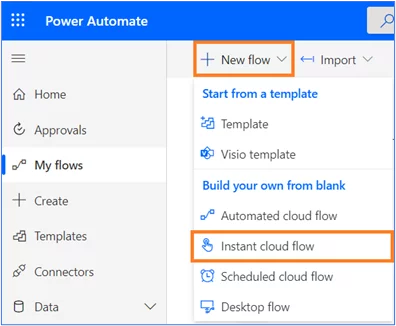
- Create an Instant Cloud Flow – Click on Instant Cloud Flow under New Flow.
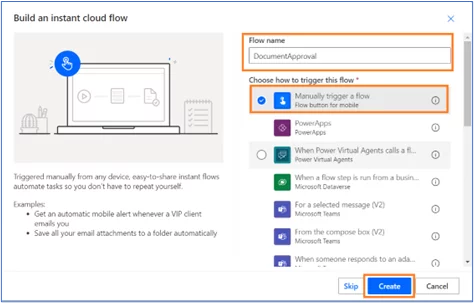
- Enter the Flow Name, select Manually Trigger a Flow, click on Create.
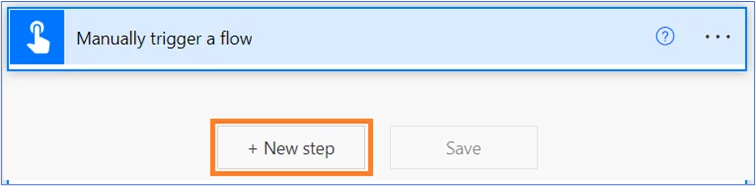
- Click on New step.
- Click on Approvals under the Standard tab and select Start and wait for an approval.

Step 2: Configuring Approval In Power Automate
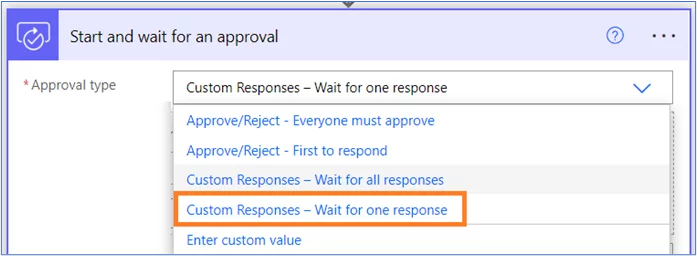
- Next, we have to select an approval type. When you expand the dropdown for Approval Type, we can see 4 different options.
-
- Approve/Reject – Everyone must approve – In this type, the outcome of the approval is “Approved” only if all the approvers approve. If one of the approvers rejects, then the outcome is “Rejected”.
-
- Approve/Reject – First to respond – If this type is selected, the outcome of the approval is the first response received from any of the assigned approvers.
-
- Custom Responses – Wait for all responses – In this selection, we can add custom options for the approver to select, unlike in the first two approval types which have only two options – Approve and Reject.
In this case, all the responses from all the approvers are received. We can then add additional logic in the subsequent steps to arrive at a decision based on all the responses.
-
- Custom Responses – Wait for one response – Similar to the previous approval type, we can add custom responses. But the action moves to the next step when any one of the approvers selects a response, which becomes the final outcome of the approval.
For this example, let us select “Custom Responses – Wait for one response”.
- We will now configure the options. Click Add a new item and enter the options as shown below. It is recommended to add up to 5 options although more options can be added.

- Let us configure some of the other options.
-
- Title – Enter a title in this field.
-
- Assigned To – This is where we can assign Approvers. Multiple approvers can be added by entering their email IDs delimited by semicolons.
Microsoft 365 groups can also be assigned as the approver in which case a response from any one user from the group will represent the entire group’s response.
-
- Details – We can use Markdown syntax to format any information or details we would like to share with the approver. Markdown syntax is a light-weight syntax used for formatting plain text.
Enter the details as shown below. The symbols # (for Header formatting) and ** (for bold font) are some examples of formatting using Markdown syntax.
-
- Item Link and Item Description – Here we can add the URL of any external item which might contain additional details required for the approver to make a decision. It will be presented as a clickable link to the approver. We will add a sample URL and a description.

- Let us now check some of the advanced options available. Click on Show advanced options.
- Requestor – By default, the user creating the flow is the requestor. But we can also add any other user as the requestor by entering the email address.
- Enable notifications – This option is used to enable or disable email and push notifications which the approver receives. By default, it is set to Yes.
- Enable reassignment – By setting this option to No, the approver will not be able to reassign a different approver. By default, it is set to Yes.
- Attachment section – This is where we can attach any files to be sent along with the approval request. Let us now add our document in the next step.
- First, get the file from OneDrive. Click on Insert new step icon before Start and wait for an approval and click on Add an action.

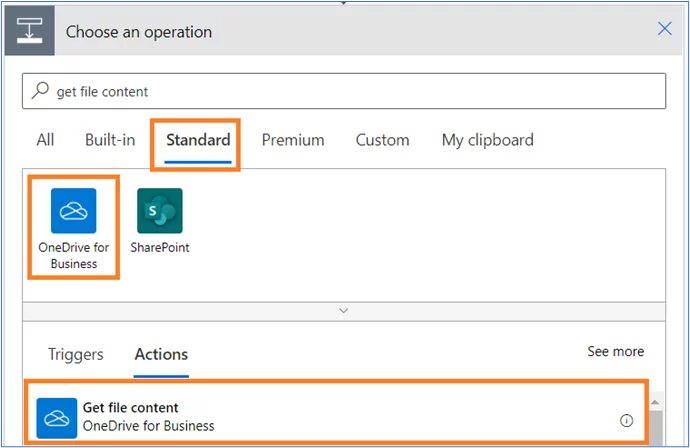
- Under the Standard tab, select OneDrive for Business and click on Get file content.
- Select the file by clicking on the folder icon and then navigating to the location of the file.
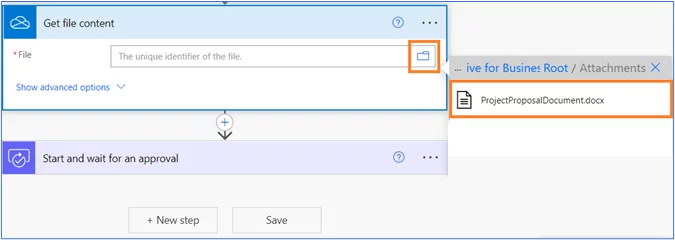
- Next, in the attachment section of Start and wait for an approval, enter the attachment name. To add the attachment content, select File Content under Get file content in the Dynamic Content tab.

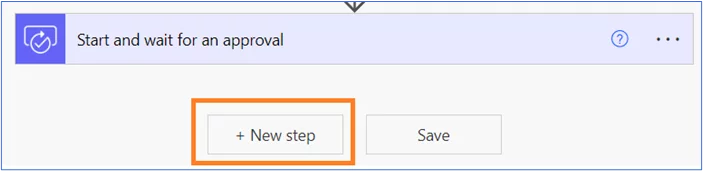
- Click on New Step.
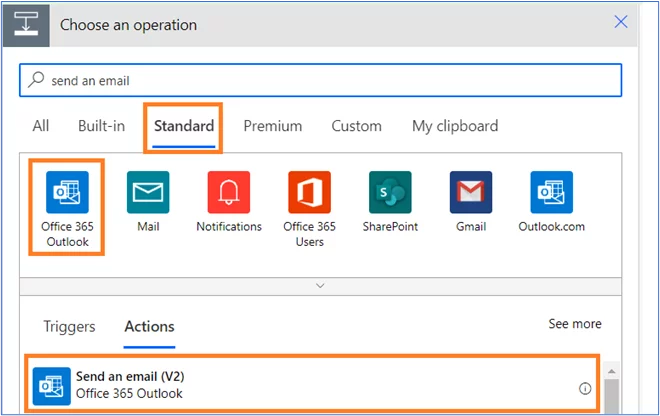
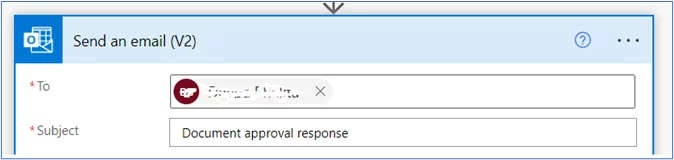
- Send an email to the requestor informing about the status of the approval. Click on Office 365 Outlook under Standard tab and select Send an email (V2).
- Enter the email address of the requestor in the To field and enter the Subject.
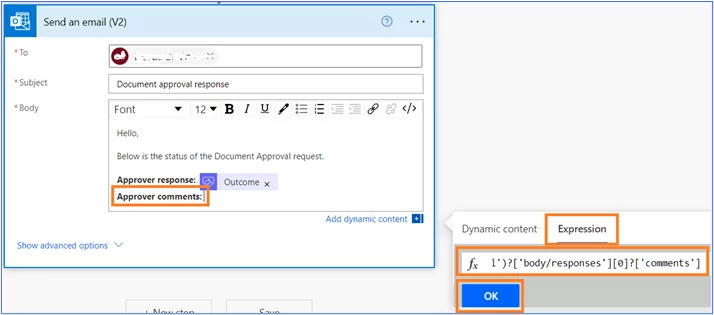
- In the email body, add the approver response and approver comments. Place the cursor next to Approver response as shown below. Click on Outcome under Start and wait for an approval in the Dynamic Content tab.

- Similarly, place the cursor next to Approver Comments. Click on the Expressions tab and enter the expression outputs(‘Start_and_wait_for_an_approval’)?[‘body/responses’][0]?[‘comments’].
Click on OK. As we have only one approver in our example, we can use this expression to get the comments of the first response or the comments of the first approver.
- Click on Save.

Step 3: Testing Approval In Power Automate
- Click on Test. Select Manually and click on Test button.

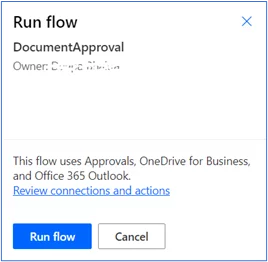
- Click on Run Flow.
- Click on Done.

- The approver receives an email notification as shown below. We can notice the attachment, link, the formatted details section (header and bold font) and custom options in the email.

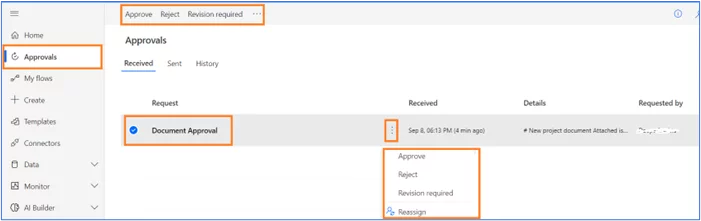
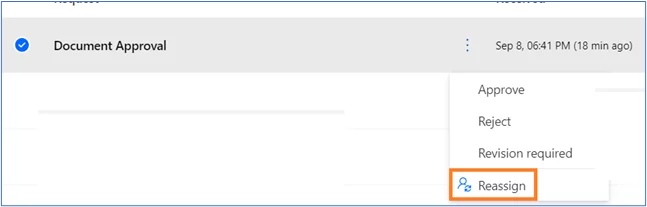
- The approval request can also be viewed in the Approvals section in Power Automate. The custom options can be seen at the top as well as against every request as shown below. Additionally, there is also the option to reassign the approval to a new approver.
- To reassign to a new approver, you can click on the Reassign button.
- Enter the email address of the new approver and click on Confirm.

- The original approver will now see the below message in the email.

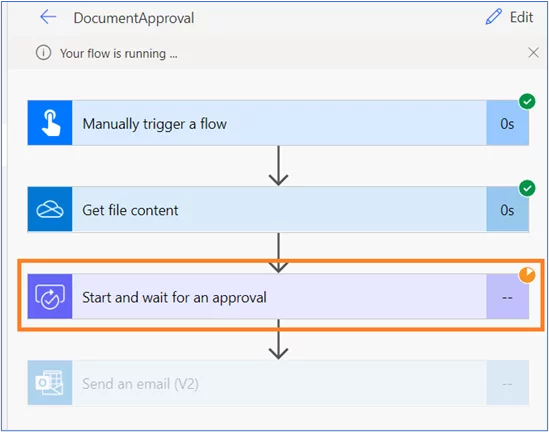
- Notice that the flow is waiting for a response from the approver.
As of today, the approval flow has a maximum wait time of 28 days after which the flow will fail.
- Let us respond to the approval. Click on Revision required and enter comments. Click on Submit.

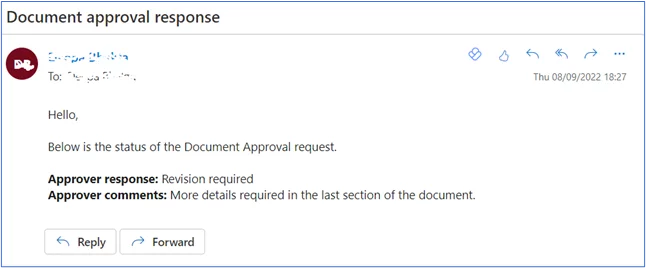
- The requestor receives an email as shown below. We can see the approver’s response and the comments entered.
Conclusion
As approval processes are the fundamental part of every business, it is very important to have an organized system in place. From this article, we have seen how simple it is to automate such processes using Power Automate approvals. In addition, Power Automate can be seamlessly integrated across several services like SharePoint, Teams, Dataverse, etc. thereby making management of approvals within an organization effortless and efficient.
Looking for more on Power Automate? Try our guide on Do Until Loops here!


- Facebook: https://www.facebook.com/profile.php?id=100066814899655
- X (Twitter): https://twitter.com/AcuityTraining
- LinkedIn: https://www.linkedin.com/company/acuity-training/