
Excel Guide: Remove Blank Rows Or Cells
Contents
Occasionally you may find that it’s necessary to clean up your data and part of that cleaning up, may involve removing blank rows or blank cells.
In this post, we are going to show you how to remove blank rows in Excel or remove individual blank cells when needed.
This is an important part of cleaning up data, data analysts on our starter Excel course find it very helpful.
What does cleaning up data mean?
You may often receive spreadsheets from your colleagues or need to import data from databases and other external sources.
Initially, this data may not be suitable for data analysis in Excel. You will then need to clean the data in some way first.
Let’s review some of the common issues and a few ways of cleaning up or dealing with these issues.
- Extra spaces from text
- Numbers stored as text
- Duplicate values
- Errors
- Spelling Errors
- Dates stored as text
- Problems with Visual formatting
- Blank rows or cells within a data set
Blank rows take up additional space and can make navigation of your worksheet more difficult.
How to Delete Blank Rows In Excel Using Go To Special
In our source example, we have a list of beverages and their corresponding prices. We would like to delete the empty rows.
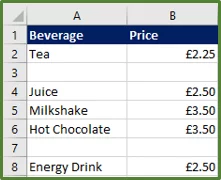
- So, the first thing we need to do is select the data range of interest, which in this case is cell range A2:B8.
- This is the cell range that contains the data and the blanks.
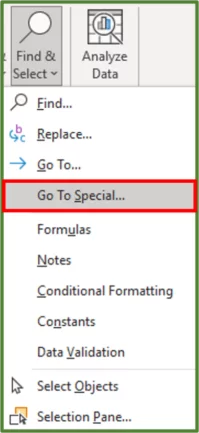
- With the range selected, go to the Home Tab (Step 1 in the image) and on the Editing Group click on Find and Select (Step 2 in the image).

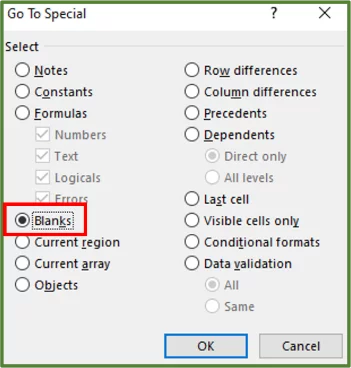
- Select the Go To Special… option.
- You should see the Go To Special Dialog Box.
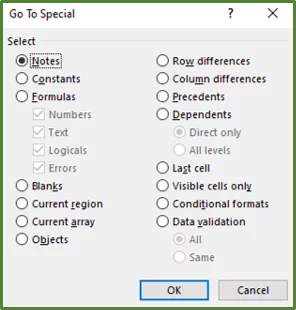
- Check the Blanks option and then click Ok.
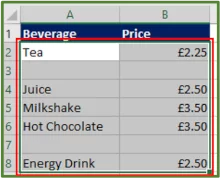
- You should now see the blank cells within the range selected.
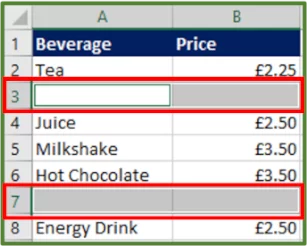
- Now with these cells selected, go to the Home Tab and on the Cells Group click on the Delete drop down arrow.
We will select the Delete Sheet Rows option.

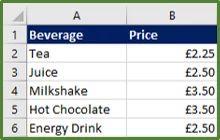
- You should see the following.
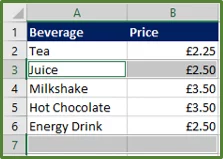
- Click on any cell to deselect the selected cells.
How To Delete Blank Rows In Excel Using Filter
Now the method to remove blank rows in Excel that was demonstrated in the above example, works well for simple data sets.
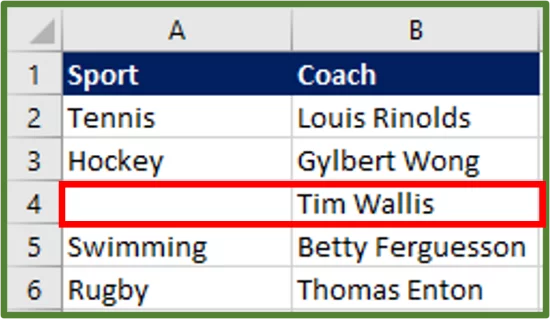
However, you may have a more complex data set such as the one shown below, where you will need to use the Filter method to remove empty rows in Excel.
You can also use the FILTER Function to filter out empty rows!
In our source example row 3 is completely blank however, row 5 contains the coach data but not the sport information.
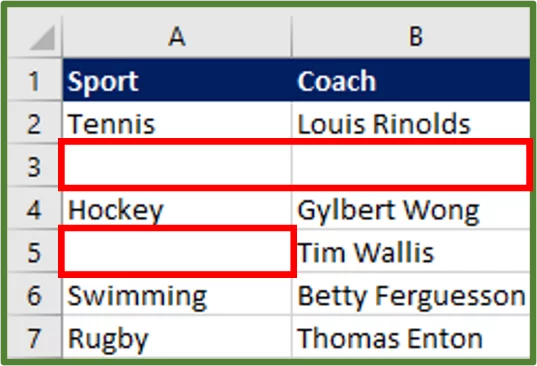
Now if we use the previous method to delete the rows, Excel will delete rows 3 and 5 which we do not want.
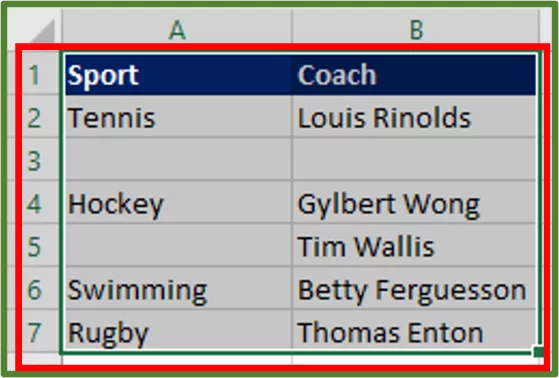
- So, to delete only row 3, select the range of interest which in this case is range A1:B7.
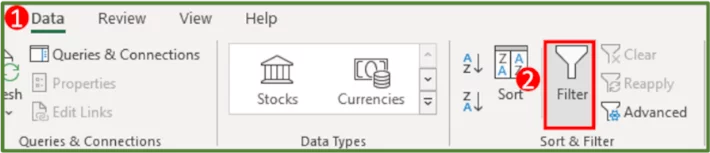
- Now with this range selected, go to the Data Tab (Step 1 in the image) and in the Sort & Filter Group select Filter (Step 2 in the image).
- You should see the following.
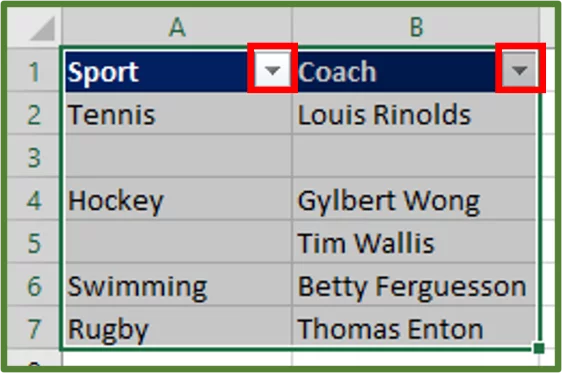
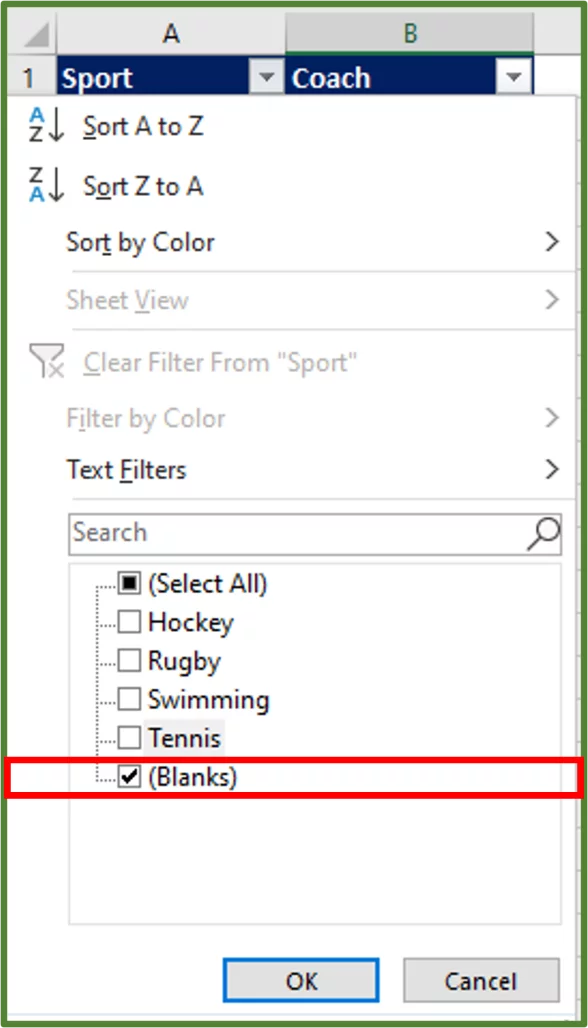
- Now we will begin with column A, select the drop down next to Sport and select Blanks and then click Ok.
- The result is shown below.

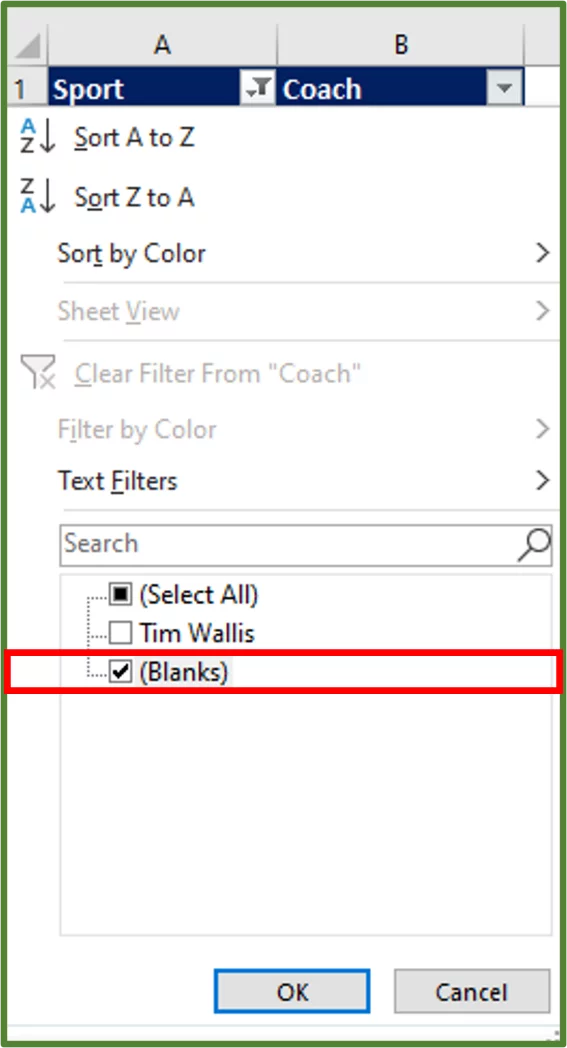
- Now click on the drop-down arrow on column B and then select Blanks and click Ok.
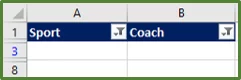
- The result is the following which shows only row 3.
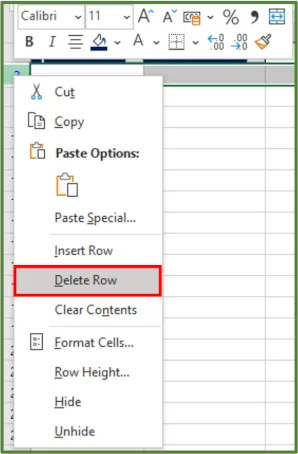
- Now select row 3 and right-click and select Delete Row.
- Press Ctrl-Shift-L which is the shortcut for the Filter option to turn the Filter off. You will see the entire data set with the blank row removed.
- The row which does not contain the sport information but only has the coach details is still there.
Troubleshooting When Deleting Blank Cells
There may be times when you encounter problems when trying to remove blank rows or cells.
Let’s look at some of the common scenarios and ways of resolving these issues.
Verify your Initial Range
When using the Go To Special… option, you may find that cells outside your range of interest were selected, in which case press Ctrl-Z on the keyboard and re-select the range of interest.
Review the headings when using Filter
Let’s say you highlighted only your range without the headings and then pressed Ctrl-Shift-L, the filter will not be correct.
So simply press Ctrl-Shift-L to toggle the Filter and then re-select the correct range of interest with the headings included.
Check you’re selecting the right option from the Delete ? Dialog Box
When using the Delete ? Dialog Box you will get options to either Shift cells left, Shift cells up, Entire row or Entire Column.
So, the option you choose will depend on the layout of your data.
Sadly, unlike with formulas and functions – there is no auditing tool for these methods!
Conclusion
Manually removing blanks rows can be time-consuming, especially when you are working with large data sets.
Save yourself the hassle, and keep using these methods!
If you want to change blank rows instead of deleting them, try using font formatting to highlight them!
Special thank you to Taryn Nefdt for collaborating on this article!


- Facebook: https://www.facebook.com/profile.php?id=100066814899655
- X (Twitter): https://twitter.com/AcuityTraining
- LinkedIn: https://www.linkedin.com/company/acuity-training/