
PhotoShop: Mixing Colour & Black And White!
Photoshop can create countless artistic and attractive images.
One such example is creating images partly in Black and White, and partly in Color.
This can increase the effectiveness of photography as well as illustrations.
This tutorial covers some of the techniques that we cover in our Photoshop Courses.
It will show you how to create an image in Adobe Photoshop which is part colour and part black and white.
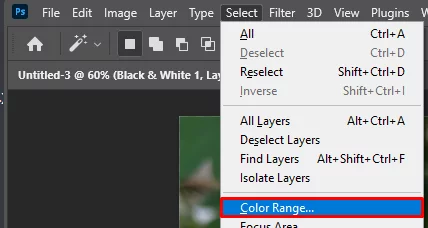
Adding A Color Range
This first thing you are going to want to do is to create a copy of the background layer which will have your picture on it if you have opened it straight into Photoshop. Once you have done that select the copy layer and go to the select tab and then down to Colour Range.
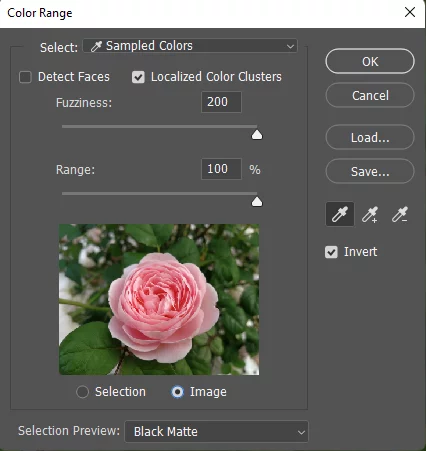
The colour range lets you select areas of the photo by choosing the colour. You can also make it so that it will select everything apart from the colour you have chosen.
We want to have the petals of the flower in colour and the rest in black and white. So to do this we click on the eye dropper tool which is on the righthand side of the window and just click in the middle of one of the petals.
Make sure the rest of the settings are set to the same as mine below you especially need it inverted so that the petals are the only thing not selected.
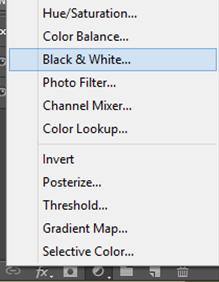
Once you click ok then you will see that everything apart from the petals have been selected this means we can easily change it into black and white.

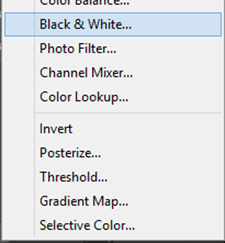
Now we are ready to change it into black and white. To do this we go to the adjustment options which are located under the layers pane or in the layer tab. When you have got the menu up you need to go to black and white and click on it. This will bring up a Photoshop menu where you can change some settings to change what the black and white looks like. I did not want to change any of settings and just kept as standard black and white.
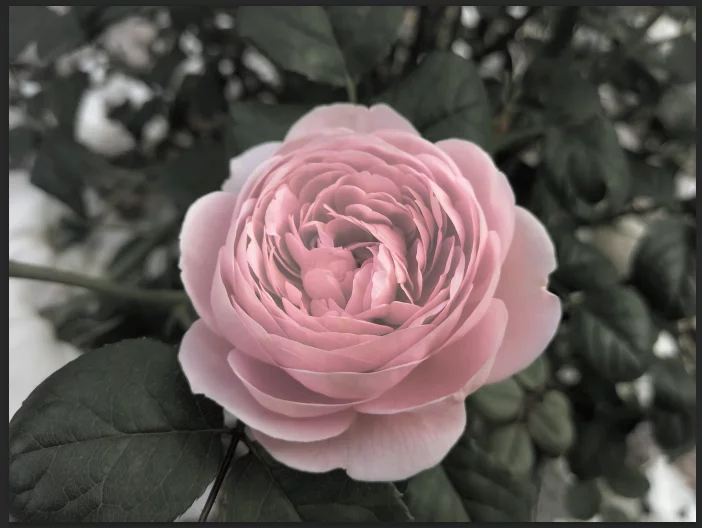
You should now have something which looks like this. Where the petals of the flower are coloured and the rest is black and white. You can see that some of the background had the same colour petals so some of them are coloured ever so slightly.
Using The Magic Wand Tool
There is another method to do this in Photoshop which will give it a different look but will have the same effect. You are going to want to create a copy of your photo just like the method before and select the copy layer. Instead of using the colour range we are going to use the magic wand tool. This can be located under the free transform tool.
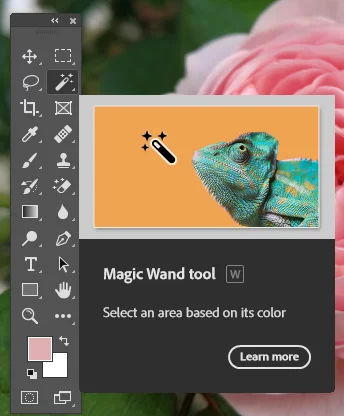
Once you have selected the tool then you need to start selecting the area around the flower head. You will need to hold shift when using the magic wand tool so that you can select more than one area at a time.
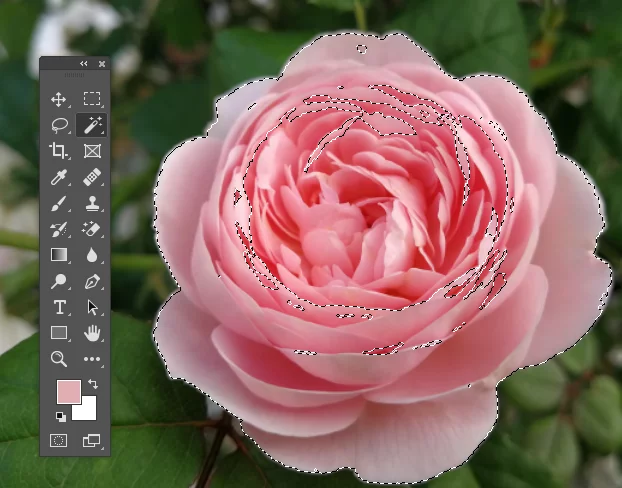
Now you have the area selected then you are ready to turn it into black and white and to do this we do it in same way as the method before. So add an black and white adjustment layer then configure it to how you like it. This time I did not invert the selection so everything apart from the petals will keep its color.
You should then be left with something that looks like this. As you can see the centre of the flower is now the only thing in colour unlike the method before where the petals where the only thing in colour.

For more Photoshop features and applications, read our guide here on Morphing human face with animal faces.


- Facebook: https://www.facebook.com/profile.php?id=100066814899655
- X (Twitter): https://twitter.com/AcuityTraining
- LinkedIn: https://www.linkedin.com/company/acuity-training/