Power BI: Connecting Power BI to SQL Server
Power BI supports a variety of data sources such as Blank Queries, Flat Files, SQL Server Database, OData Feed, Azure Cloud Platform etc.
The number of import features you have will depend on the version of Power BI that you have, (more information on Power BI versions here) but this guide will work for all versions. You can obviously import individual files and multiple files from a folder into Power BI if a data connection is not available.
In this article, you will see how to connect to SQL Server Database source with Power BI Desktop, in order to import data stored in your SQL Server instance and visualise it, for example using a smart narrative visual or Gantt chart.
In this article, where you see text in its own box that is a snippet of code. Please refer to the Appendix if you need to Download and Install Power BI.
Describing how to do this is often part of job interviews for entry-level data analysts.
The ability to connect to multiple different datasets simultaneously is one of the key benefits of using Power BI.
Creating a Dummy Dataset
In this section, a dummy dataset will be created in SQL Server. In the next section, you will see how to connect Power BI with SQL Server and then import the dummy dataset into Power BI Desktop.
We will create a simple SQL Server database for a fictional book store. The name of the database will be BookStore, remember we want to get data from here so we should name everything appropriately. The following script creates our database:
CREATE DATABASE BookStore
The database will contain three tables: Books, Categories and Authors. The following script creates the Books table in your SQL Server:
USE BookStore
CREATE TABLE Books
(
Id INT PRIMARY KEY IDENTITY(1,1),
Name VARCHAR (50) NOT NULL,
Price INT,
CategoryId INT,
AuthorId INT
)
CREATE TABLE Books
(
Id INT PRIMARY KEY IDENTITY(1,1),
Name VARCHAR (50) NOT NULL,
Price INT,
CategoryId INT,
AuthorId INT
)
The Books table contains four columns: Id, Name, Price CategoryId, and AuthorId.
Similarly, execute the following script to create the Categories and Authors tables:
USE BookStore
CREATE TABLE Categories
(
Id INT PRIMARY KEY,
Name VARCHAR (50) NOT NULL,
)
CREATE TABLE Categories
(
Id INT PRIMARY KEY,
Name VARCHAR (50) NOT NULL,
)
Let’s now insert a few dummy records in the Categories table.
INSERT INTO Categories
VALUES (1, ‘Cat-A’),
(2, ‘Cat-B’),
(3, ‘Cat-C’),
(7, ‘Cat-D’),
(8, ‘Cat-E’),
(4, ‘Cat-F’),
(10,’Cat-G’),
(12,’Cat-H’),
(6, ‘Cat-I’)
VALUES (1, ‘Cat-A’),
(2, ‘Cat-B’),
(3, ‘Cat-C’),
(7, ‘Cat-D’),
(8, ‘Cat-E’),
(4, ‘Cat-F’),
(10,’Cat-G’),
(12,’Cat-H’),
(6, ‘Cat-I’)
Similarly, run the following script to insert records in the Authors table.
INSERT INTO Authors
VALUES (1, ‘Author-A’),
(2, ‘Author-B’),
(3, ‘Author-C’),
(10, ‘Author-D’),
(12, ‘Author-E’)
VALUES (1, ‘Author-A’),
(2, ‘Author-B’),
(3, ‘Author-C’),
(10, ‘Author-D’),
(12, ‘Author-E’)
Finally, to add dummy records in the Books table, run the following script.
Note: Since the Id column of the Books has Identity property, we do not need to specify the value for the Id column.
INSERT INTO Books
VALUES ( ‘Book-A’, 100, 1, 2),
( ‘Book-B’, 200, 2, 2),
( ‘Book-C’, 150, 3, 2),
( ‘Book-D’, 100, 3,1),
( ‘Book-E’, 200, 3,1),
( ‘Book-F’, 150, 4,1),
( ‘Book-G’, 100, 5,5),
( ‘Book-H’, 200, 5,6),
(‘Book-I’, 150, 7,8)
VALUES ( ‘Book-A’, 100, 1, 2),
( ‘Book-B’, 200, 2, 2),
( ‘Book-C’, 150, 3, 2),
( ‘Book-D’, 100, 3,1),
( ‘Book-E’, 200, 3,1),
( ‘Book-F’, 150, 4,1),
( ‘Book-G’, 100, 5,5),
( ‘Book-H’, 200, 5,6),
(‘Book-I’, 150, 7,8)
Now the SQL Server Database is fully functioning, and you are ready to connect SQL Server and Database to Power BI.
Connecting Power BI with SQL Server
Now you have your dataset; the next step is to connect Power BI with SQL Server and then import the BookStore dataset into Power BI.
Connect Power BI Desktop to SQL Server basically refers to importing the dataset from an SQL Server database to Power BI. To do so, you have to follow these steps:
1. From the top menu, click on the “Get Data” option. A drop-down list will appear displaying all the available data sources for Power BI – including the SQL Server – as shown in the following screenshot.
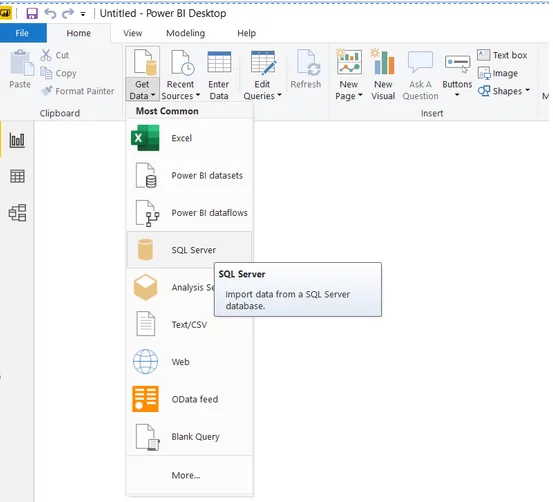
From the above figure, you can see that there are lot of different options for importing datasets depending upon the data source. We want to connect to SQL Server and fetch data from a SQL Server database, therefore click on Connect SQL Server option from the Get Data drop-down list.
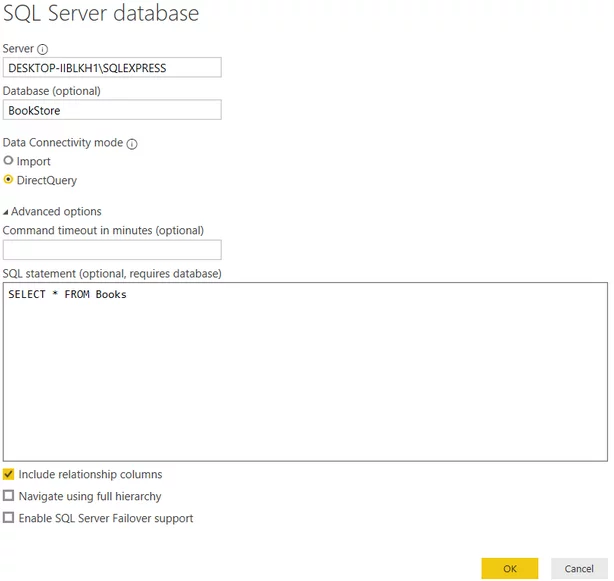
2. You should see the following dialog box.

Enter the name of the Server and the Database name that you want to access in the dialog box. Enter your server name in the Server field and in the Database field, enter “BookStore” i.e. the dataset that we created earlier.
If you do not specify the database name in the dialog box, all the databases on your server will be loaded. Click OK button. If the connection is established successfully with the SQL Server, you should see the following window:
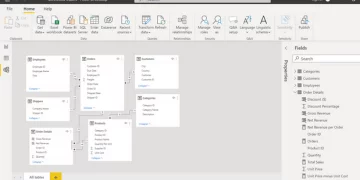
3. Here you can select and load the tables you want by simply clicking the checkboxes. Click the “Load” button to load the dataset into Power BI. Look at the following screenshot for reference.

4. Once the database tables are loaded, you will be able to see them on the right-hand side of the screen. You can select any categories from table names. For instance, we select the id and name columns from the Books table as shown below:

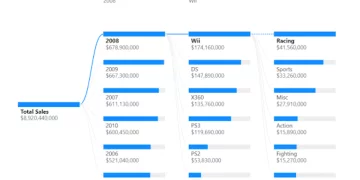
5. Finally, from the visualization tab, you can select the type of plot that you want to plot against the selected columns of the books table. For instance, if you select the stacked column chart, you will see the following graph.
You can see the bar plot for book names against their prices.

Now your SQL Server is linked with PowerBI! As you saw from the drop down, you can even import data from Excel And Access, read this article on importing data into Power BI from Excel and Access to expand your PowerBI further!
Connecting Power BI to SQL Server Via SQL Queries
You can also execute SQL queries in Power BI to retrieve the data that you want from SQL Server databases. To do so, while you connect SQL Server database, go to “Advanced Options” and then type your SQL Server query in the query window and click ok. For instance, the following query selects all the records from the Books table of the BookStore database.
In the output, you will see all the records from the Books table as shown below.

You can click the “Load” button to load these records into Power BI, straight rom your SQL Server.
Conclusion
Microsoft Power BI is a data visualization and analytics tool that receive input data from various data sources such as SQL Server, Flat File, OData Feed etc.
With Power BI, users can see their data using Power BI visuals and create dashboards from data obtained through various sources having merged their data if necessary, without writing a single line of code. See here for details of our Power BI courses in London if you would like to learn more.
In this article, you saw how to connect Power BI with SQL Server and load data from SQL Server into Power BI. You also saw how to use SQL Queries in Power BI to retrieve filtered data.
Appendix: Downloading and Installing Power BI
This guide will take you through downloading and installing Power BI, so you are ready to link with SQL.
Here is the download page: https://www.microsoft.com/en-us/download/details.aspx?id=58494. Go here and download the executable file for Power BI according to your platform. Run the executable file to install desktop version of Power BI.
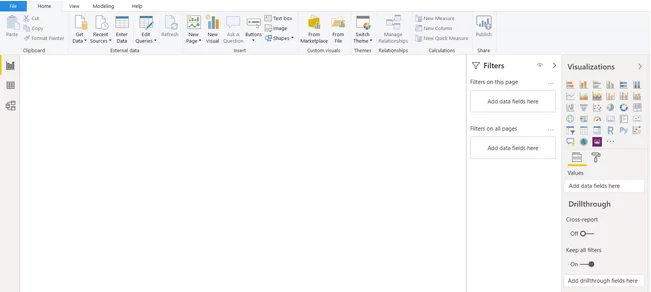
The installation process is extremely easy, you just have to click “Next” every time the dialog box appears. Once the installation is complete, you should see the following window:
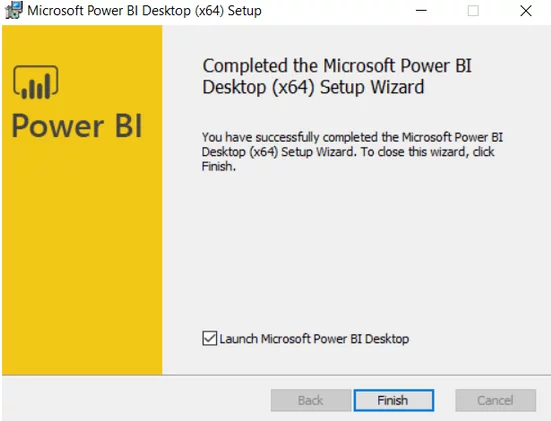
Click on the Finish button to complete the installation. Once Power BI is installed, you will need to sign in to Power BI Desktop, using your Microsoft Account. The Sign in/ Sign up window looks like this:
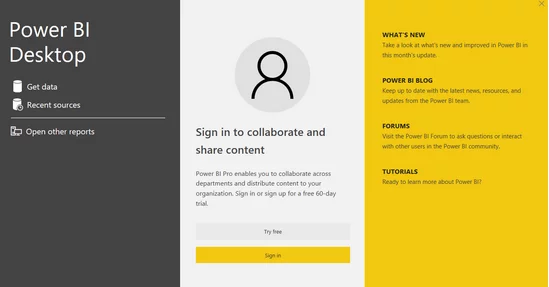
If you have not setup your Microsoft account Power BI gives you an option to signup for then Microsoft account. Once you create your Microsoft account and login to Power BI desktop, you should see the following dashboard: