
Photoshop: How to Cut Up Text
In this Photoshop tutorial we’re going to give you a taste of the type of skill that you would pick up on our Photoshop course be slicing and dicing some text.
It’s a technique that’s useful for shattering and breaking up almost any item in Photoshop.
The tutorial also introduces some useful strategies for applying textures and effects to multiple Layers simultaneously for time saving effect generation.
This also works well with the double exposure tutorial shared here.
Creating The Graph Paper And Text
To start off, use Cmd/Ctrl +O to open the graph paper image into a new layer.
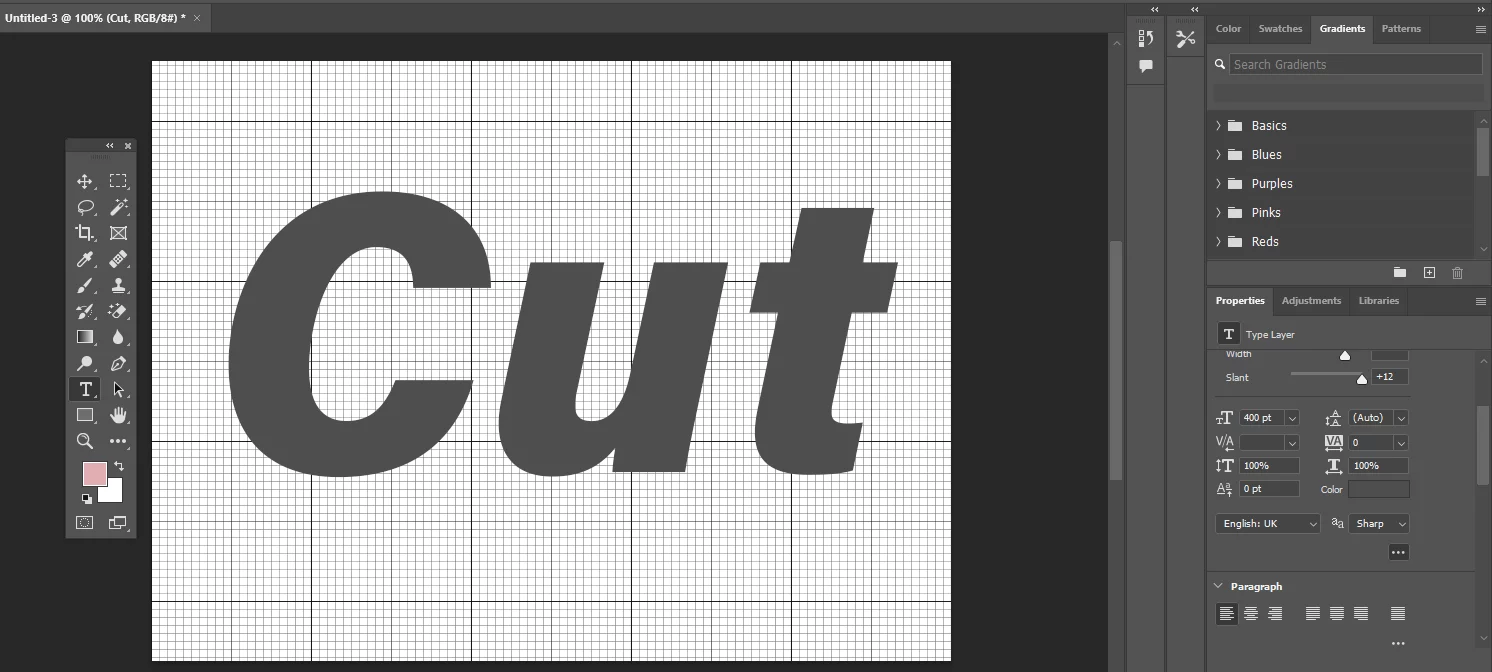
Select the Horizontal Text Tool (T) and click on the document to create a Type Layer. Enter your chosen text and then use the Options bar to specify the text attributes.
In our example, we’ve used the font Akzidenz-Grotesk BQ Bold Italic at 1000 px size. Click the Font Colour box and set the colour to R128 G128 B128. Once you’ve finished, use the shortcut Cmd / Cntl + Enter to commit the Type Layer.
You could also hand draw your text using The Pen Tool.
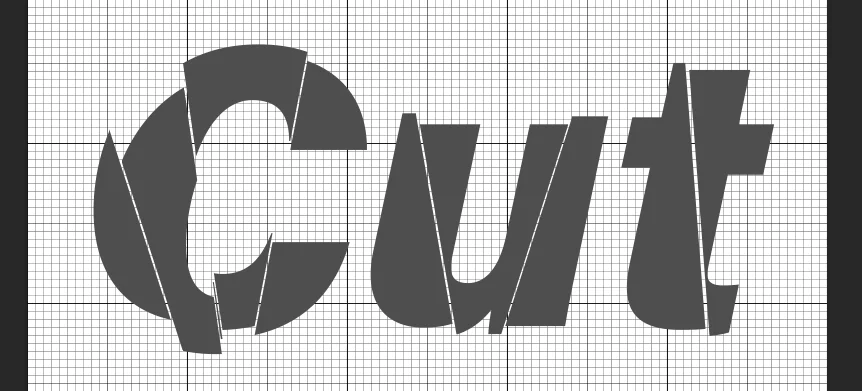
Slice Up The Text
In this step we’ll begin to slice and cut up the text we’ve just created. So that we can easily manage the Layer styles that we’ll be adding, it’s useful to have the Layers nested inside of folders. With the Text Layer selected, use the shortcut Cmd/Cntl +G to create a Layer Group. In the Window menu > Layers Panel, change the Group name to ‘Text’.
Select the Text Layer in the Panel list. Go to the Type menu > Rasterize Type Layer command to convert the Layer to pixels for editing:

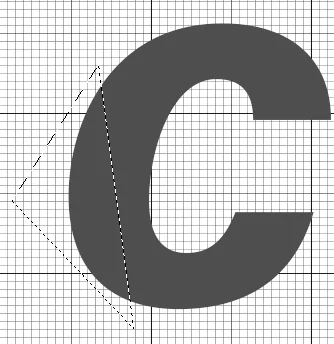
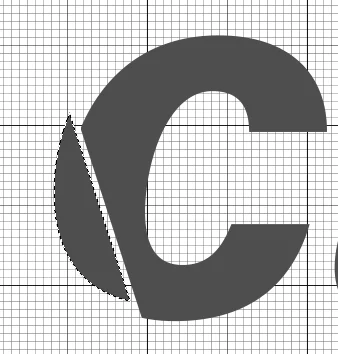
Select the Polygon Lasso tool (L). In the document, make a selection over one part of a letter. Use the shortcut Cmd / Cntl + Shift +J to cut the selected area to a new Layer. Use the Move tool (V) to offset the position of the cut copy a little:
Select the original Text Layer in the Layers Panel. Use the Lasso tool to select another section of the text and use Cmd/Cntl + Shift + J to cut that piece to a new Layer. Use the Edit > Transform > Rotate command to angle each piece a little differently from the original text. Continue with the same steps, working across all the text characters, but aim to leave some of the text behind on the original text Layer at the end:
Add Some Texture
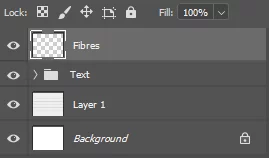
We’ll now add some texture to the text using some Pattern Fills. Having the Layers stored inside a group makes this process much easier, as we can apply these treatments directly to the parent Group, and affect all the nested Layers at once.
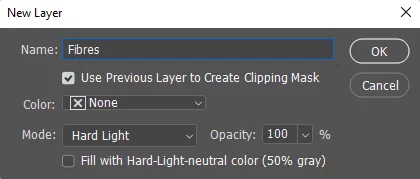
In the Window menu > Layers Panel, select the Text Group. Make sure the folder is not expanded in the Panel list. Use the shortcut to Cmd / Cntl + Shift + N to create a New Layer above the Group. In the dialog box, name it ‘ Wood Fibres’. Check to tick box to ‘Use Previous Layer as Clipping Mask’. Set the Blend Mode to Normal. Click OK:
Use the shortcut Shift key + Backspace to display the Edit menu > Fill command. In the Fill dialog box, click the Use menu and select Pattern. From the Pattern Library, click on the side menu and load the Greyscale Paper Pattern Pre-sets. Select the fibres 2 Pattern. Click OK to apply the Fill:

Use the shortcut to Cmd / Cntl + Shift + N to create another New Layer above the Group. In the dialog box, name it ‘ Parchment’. Check to tick box to ‘Use Previous Layer as Clipping Mask’. Set the Blend Mode to Overlay. Click OK:

You now have an an image stylishly cut up with a texture applied!
If you want to pick up on some more Photoshop tricks, read here on The Patch Tool!

