Adobe Illustrator: Creating a hilly scene with a sense of depth
This tutorial will show you how to create a landscape scene which has depth to it.
You can learn how to do this and more in our Illustrator course which runs in Guildford and London.
Set Up Swatches
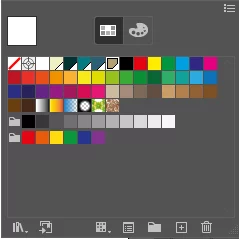
The first thing you are going to want to do is to set up your swatches with the colours you like I have used shades of blue but I use a transparency to change them later on. Your colours will need a light sky colour and then should get darker until you have a dark foreground colour.
Now we have our colours we can start making our landscape.
Create The Landscape
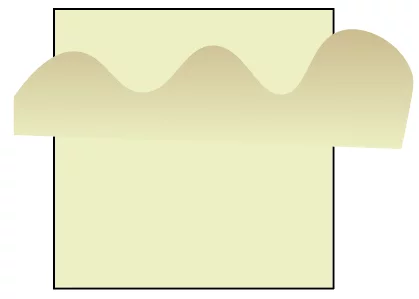
You now want to draw a box using the lightest colour in your pallet this will be your background and sky. You then want to draw your first set of hills, you want to use the pen tool for this and make them any shape.
Next you are going to want to add a gradient to it the colours should be the two lightest colours in your pallet and it should also be going from the base of the hill to the top.
To do this you need to use the gradient tool after apply the gradient and draw a line form the bas of the hill to the top peak.
Roughen The Hills
Now we have our hills we are going to want to make them look less perfect, to do this you want to go to the Effects tab and go down to Distort and Transform and go to roughen.
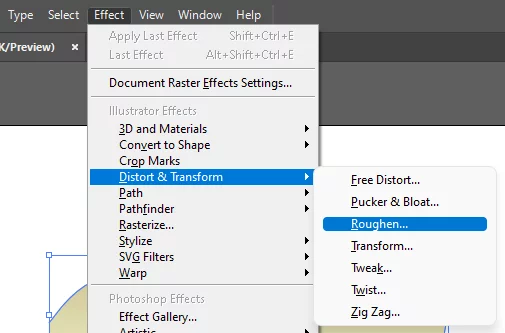
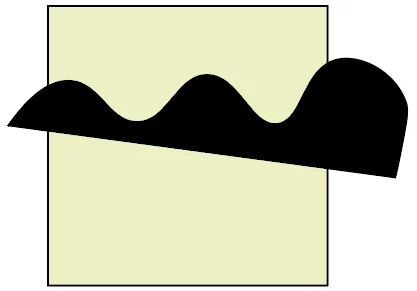
After you click on that this window will popup :
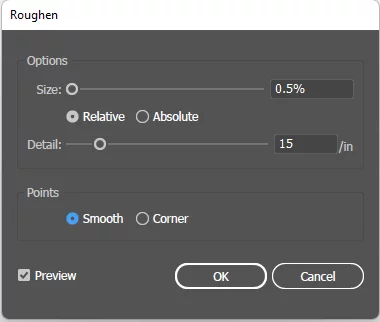
This is where you can make the hills not have a smooth edge.
I have set it to 0.5% for the size and 15 for the detail but you might want to play around with these settings to see what works best for you.
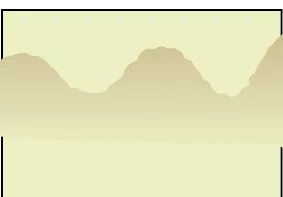
Finally we will get something like this!
Make More Hills And The Foreground
Now you want to carry on this technique until you fill the page with hills.
If you want to make it look like some hills are higher than others then add in a darker colour to the gradient and use it as the peak of the hill.
Another good idea would to make the hills which are closer to the foreground have a slightly rougher edge then the back ones.
To do this I set the front ones to 0.8 and put them back a point until I reached 0.5.
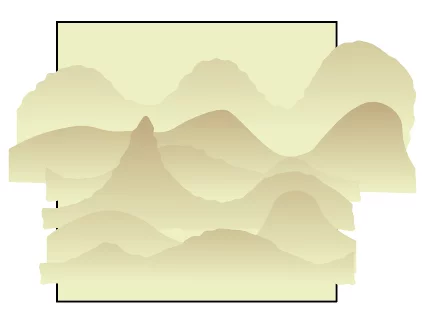
Now we will need to create the foreground just do the same thing you did for the hills but just colour it using the darkest colour in your pallet.
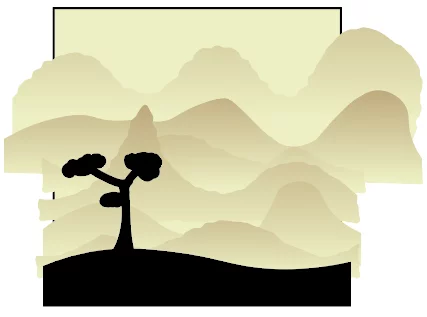
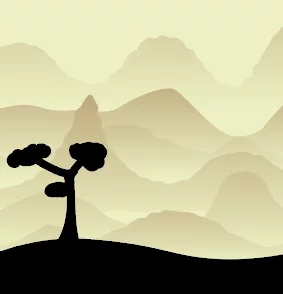
Now just cut around the original canvas and you are finished! You should have something which looks similar to this!