Illustrator: Make A Geometric Low Poly Image
There are 3 different ways you can create a geometric low poly image.
One of the ways can be very time consuming but it gives the best effect out of the 3 ways.
The first way I’m going to talk about is best for 2d images and or silhouettes.
You would also be able to achieve this effect after attending our London-based Illustrator courses.
Method 1 – Draw The Geometry
The first thing you are going to want to do is find the 2d image you want to add this effect to. I have just chosen a simple box to make this easy to understand.
After that you want to start adding in your lines to get the effect. When you ready to draw your lines grab your pen tool and start to draw triangles round your shape.

After you have done that you need to prepare your colours I would do this by setting out what colours I’m going to use so I can quickly use the eye dropper tool and select a colour.
I would also set up the same set of colours but have them with a liner gradient so that they look less flat. Once that is done you can put those colours into the image.
After you have done that you should have something that looks like this.
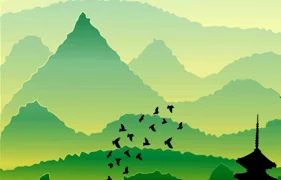
Now if you had used a 2d image of a bird then you might want to think about where the darker colours should be for the shadows this will make it look better and more like what you’re trying to make.
For more on the Gradient Mesh Tool, read here.
Method 2 – Transform + Reflect
The second way I’m going to explain is the longer way but I believe you get the best results from it.
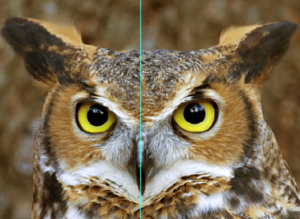
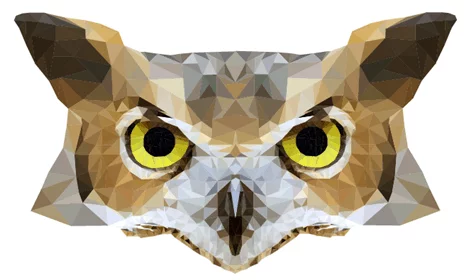
The first thing you want to do is find a picture. I chose a picture of an owl but for your first one you might want to choose something which only has a couple of colours, this will make it easier to create.
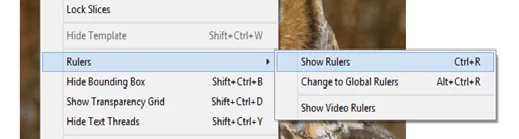
Once you have loaded your image into illustrator you are going to want to display the rulers if they are not already displayed. To do this go to View tab go down to Rulers and Show Rulers.
Once you have got your rulers to display you are going to want to put a guide line down the centre or your image, this is because we only use half the image then we reflect it so it is symmetrical.
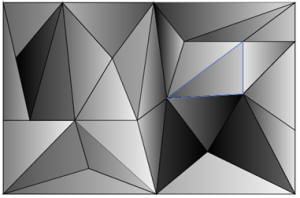
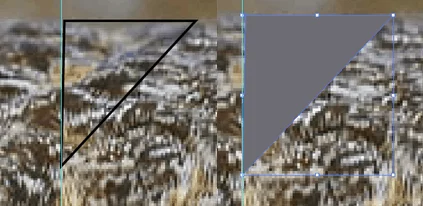
Now you need to start drawing your triangles. If you have a large are then you can use bigger triangles but if you have small area then you would need to use smaller triangles.
You need to select the pen tool making sure that no fill is selected but make sure it has a stroke on it so you can see the edges of it and then you can start. I would suggest starting from the top of the picture and work your way down.
You can colour as you go or you can do it at the end, I think its better doing as you go then you can see what you have done easily. To colour what you want to do I select the eye dropper tool and use it to select a colour from within the triangle.
This will make the end product look more like the picture.
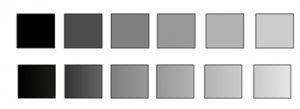
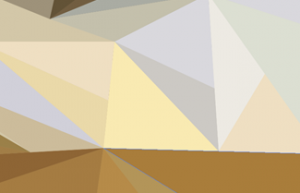
When colouring the image you need to make sure that the colours don’t drastically change to much unless they have to. For example if it goes from black to white try putting a couple of shades of grey in there to make it look smoother.
If you look at the image below its meant to go from a brownish colour to white but I have but some lighter tones in there to try and make it look more blended.
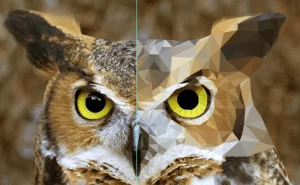
After you have done that you should have something that looks like this. Where one half of it has this geometric low poly effect to it.
When you are happy with it, you need to delete the picture but not your work. Then you need to copy and paste it over the top of the original one, to paste something on top of where you copied from just press Ctrl + F.
Then the last thing you need to do is to reflect the image to do this go to the Object tab then to Transform and down to Reflect and then a window will pop up. It should be set to the default which is what we need so just click ok.
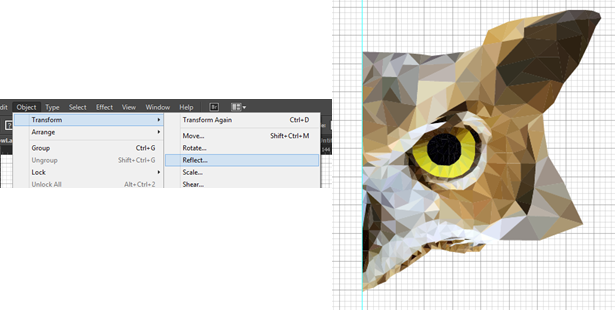
Now you have reflected the copy just move it into position and your geometric low poly picture is finished.
You could even do this with a Hand Drawn image!
Method 3 – I ♥ ∆
The third way is using a web based programme called I ♥ ∆.
This is probably the simplest way you can do this but I find it sometimes doesn’t give the best outcome.
Follow the link and download the source files.
Once you have done that in the folder you just downloaded there should be a file called index you need to click on that and it will load up the web based app.
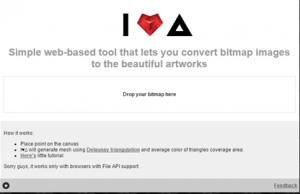
Once you upload the image into this app then you can start creating geometric image.
This app makes it very easy for you and all you have to do is click and will create the triangles you need to give you the effect.
Now after using this app you still might want to go into Illustrator or Photoshop and edit some more to make it look perfect.